Indoor air quality is often overlooked, but it’s critical to our health as we spend the majority of our time indoors. Therefore, it’s essential to assess the air quality and make improvements if necessary. So, have you checked the air quality in your environment?
Quick Note: You can find this projects code and documentation on Github!
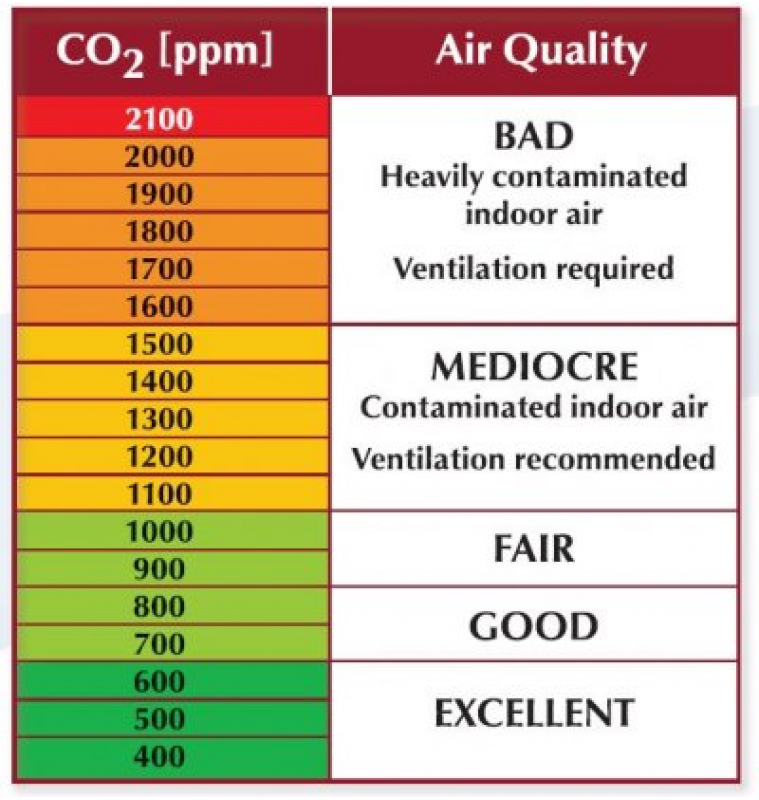
Well, lets quantify it: CO2 is the most crucial short-term indicator, measured in parts per million (ppm). If the level is too high, you may find it difficult to concentrate, and then you may feel dizzy and sleepy:
So how can we test it?
We’ll be using the MH-Z19C sensor to measure the CO2 level. This sensor has a range from 400 to 5000ppm, so it’s suitable for the above chart.
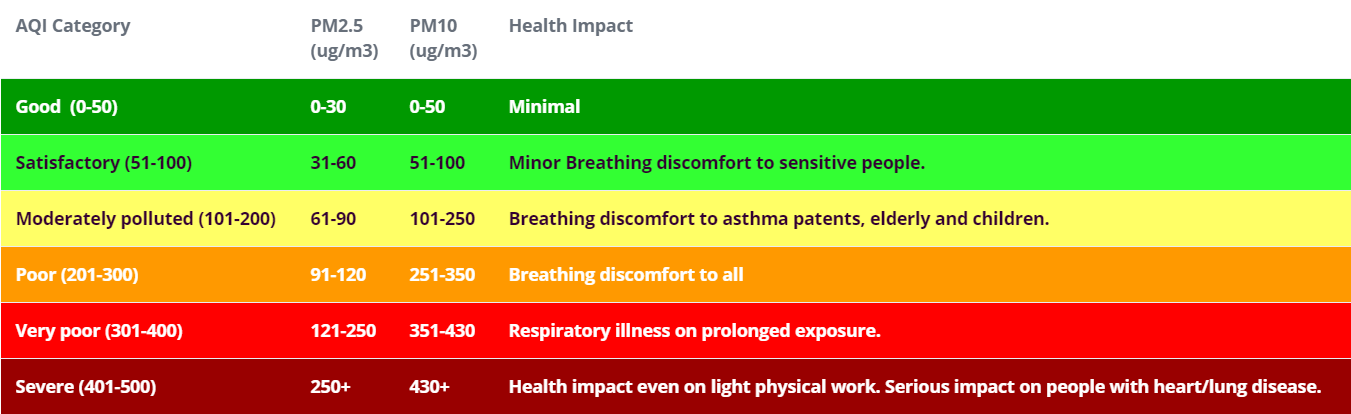
Fine particles may not have an immediate impact, but in the long term, they can seriously affect your health. They are measured in particles per 0.1l of air.
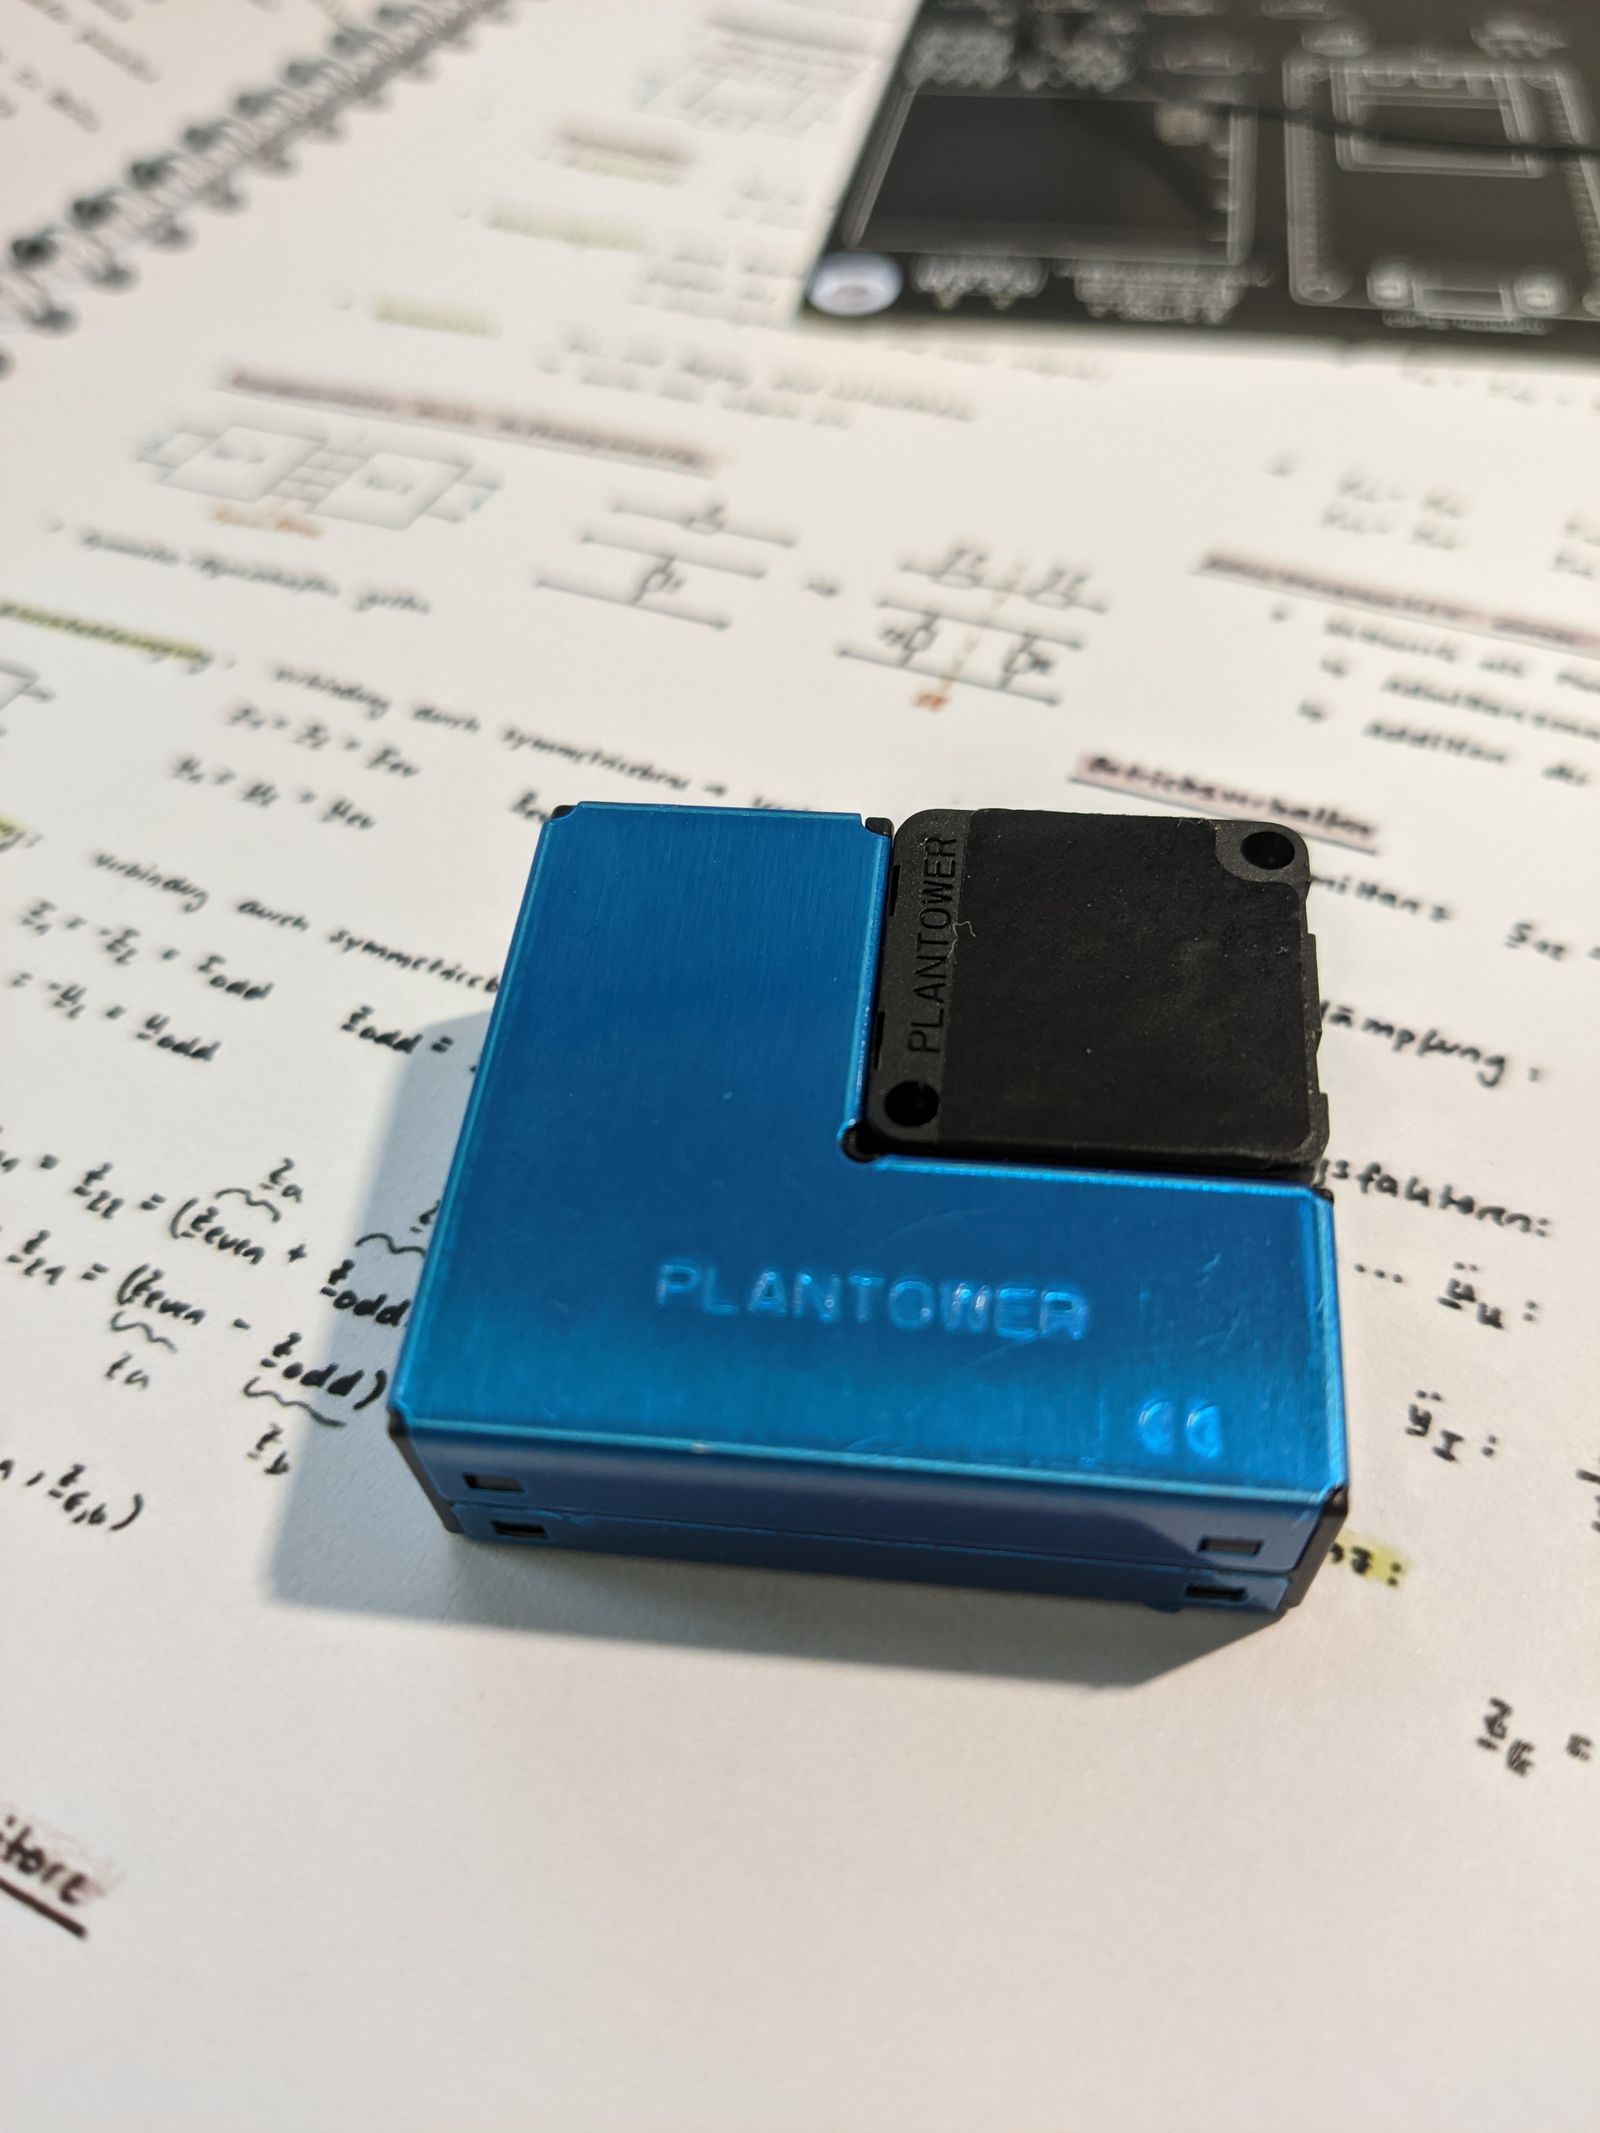
To measure fine particles, we will be using the PMSA003 sensor from Plantower.
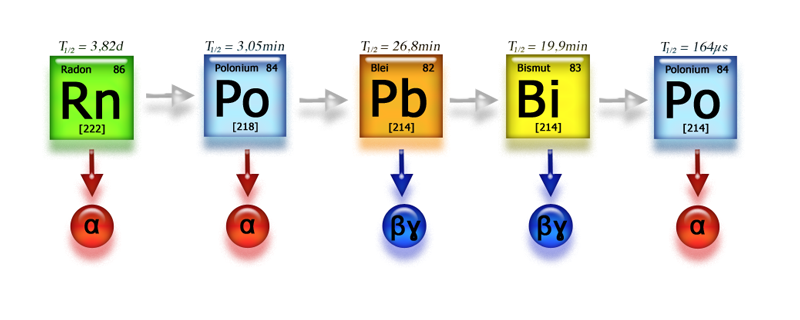
The last important indicator we will be measuring is radioactivity, with a focus on the harmful Radon gas.

Detecting Radon presents two significant challenges as it is released intermittently from decaying uranium under the house and can only be detected by measuring alpha particles. If you live in an older house with a porous foundation located in one of the red areas, you may want to consider monitoring Radon levels. This might concern me as I am in this situation.
Why is detecting alpha radiation a Problem?
Radon is undetectable by a traditional Geiger-Müller tube due to the alpha radiation it emits, and modern detection systems rely on complicated methods such as optical recognition of impacts on a CMOS sensor.
Instead of directly detecting radon, we can detect the gamma rays emitted by its decay products, such as lead and bismuth.
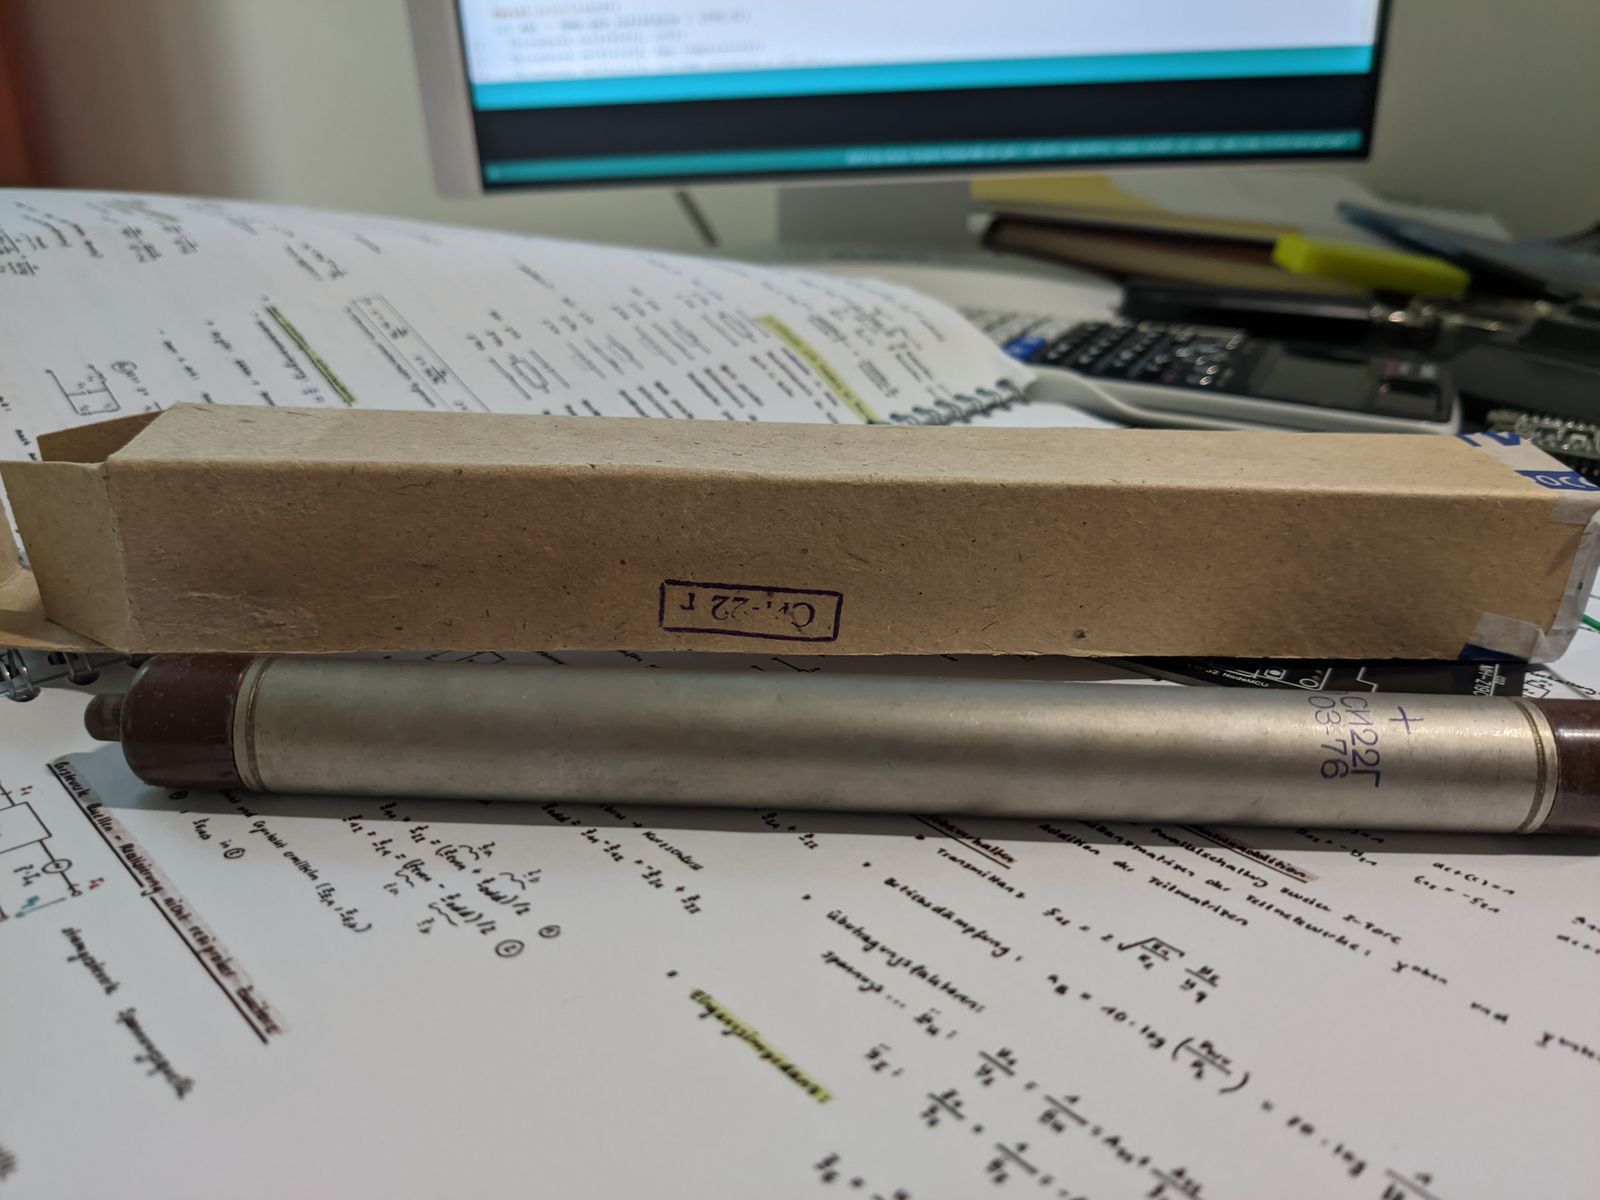
Since a Geiger-Müller Tube works only with very high voltages, such as the 403V used by my tube, the circuit required is somewhat complicated. It is partly inspired by the Multigeiger project on GitHub.
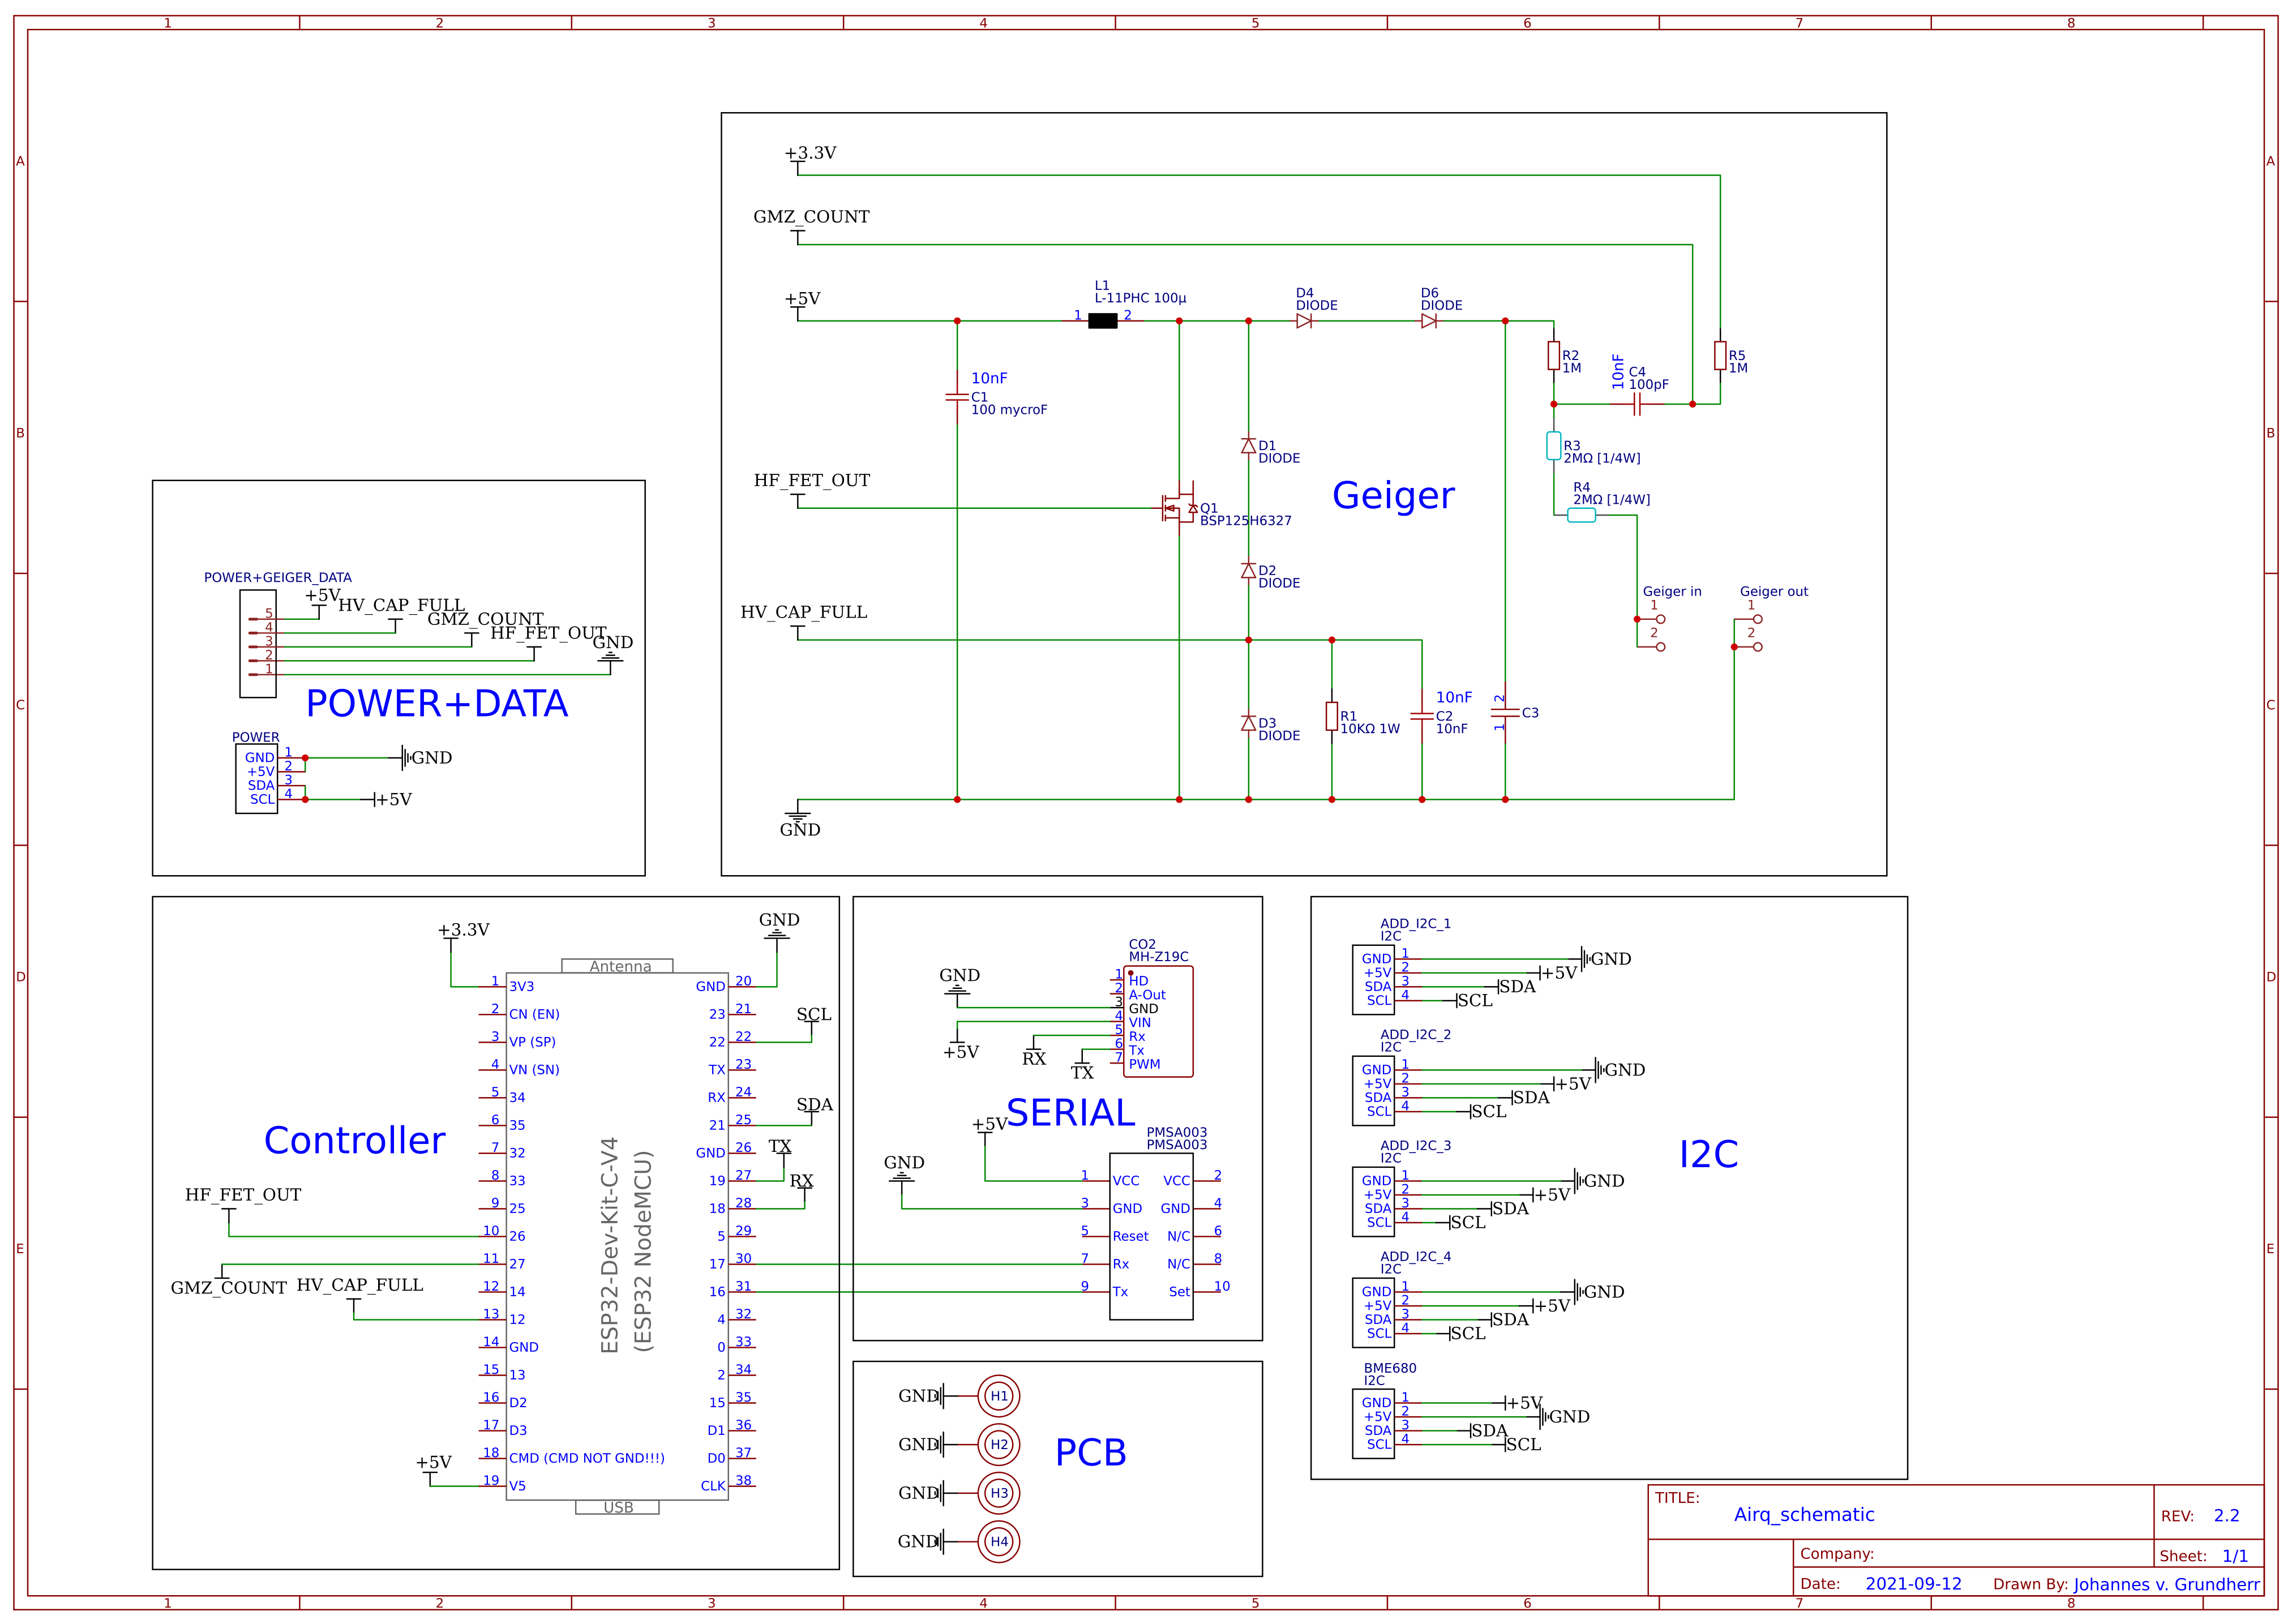
In short, we generate short pulses from the micro-controller(esp32), which generates very high voltages from the coil(Lenz’s law). Stopping when the cap is charged. Then, once a gamma ray goes through the tube and making it inductive, the capacitor discharges for a microsecond which we detect.
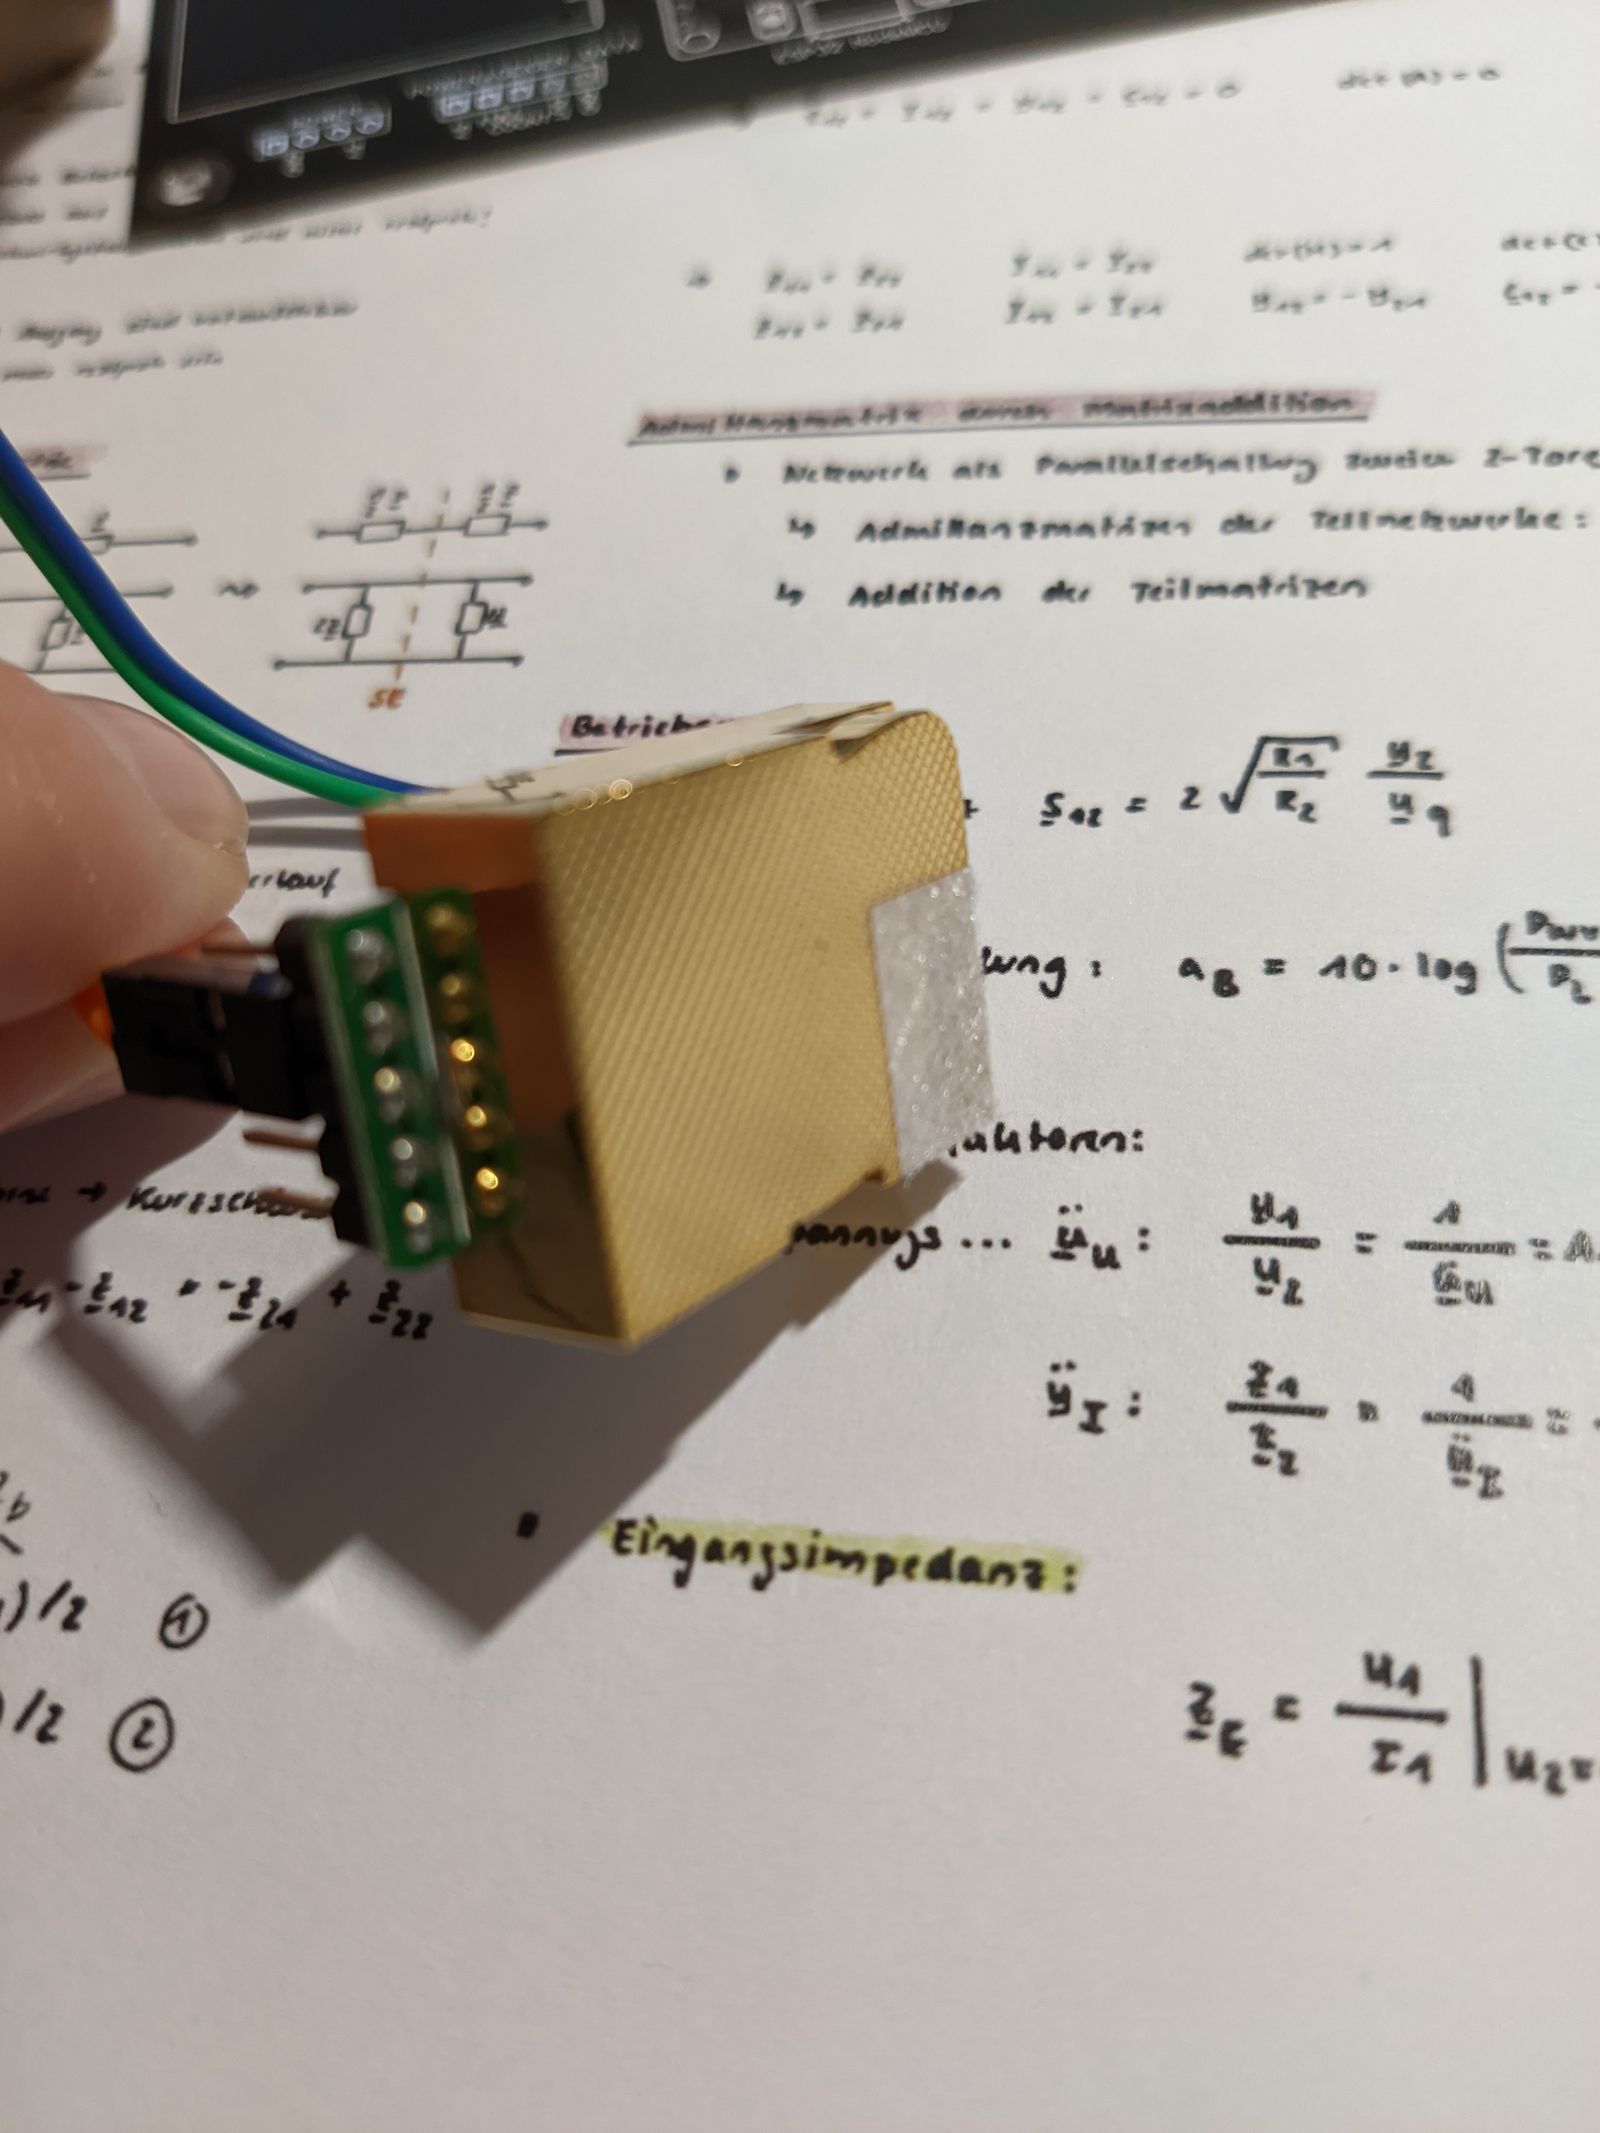
The two sensors discussed earlier use serial communication, while the environmental sensor on the bottom right uses I2C.
To allow for future expansion, I added four additional I2C headers, as it’s always useful to have extra room for more components.
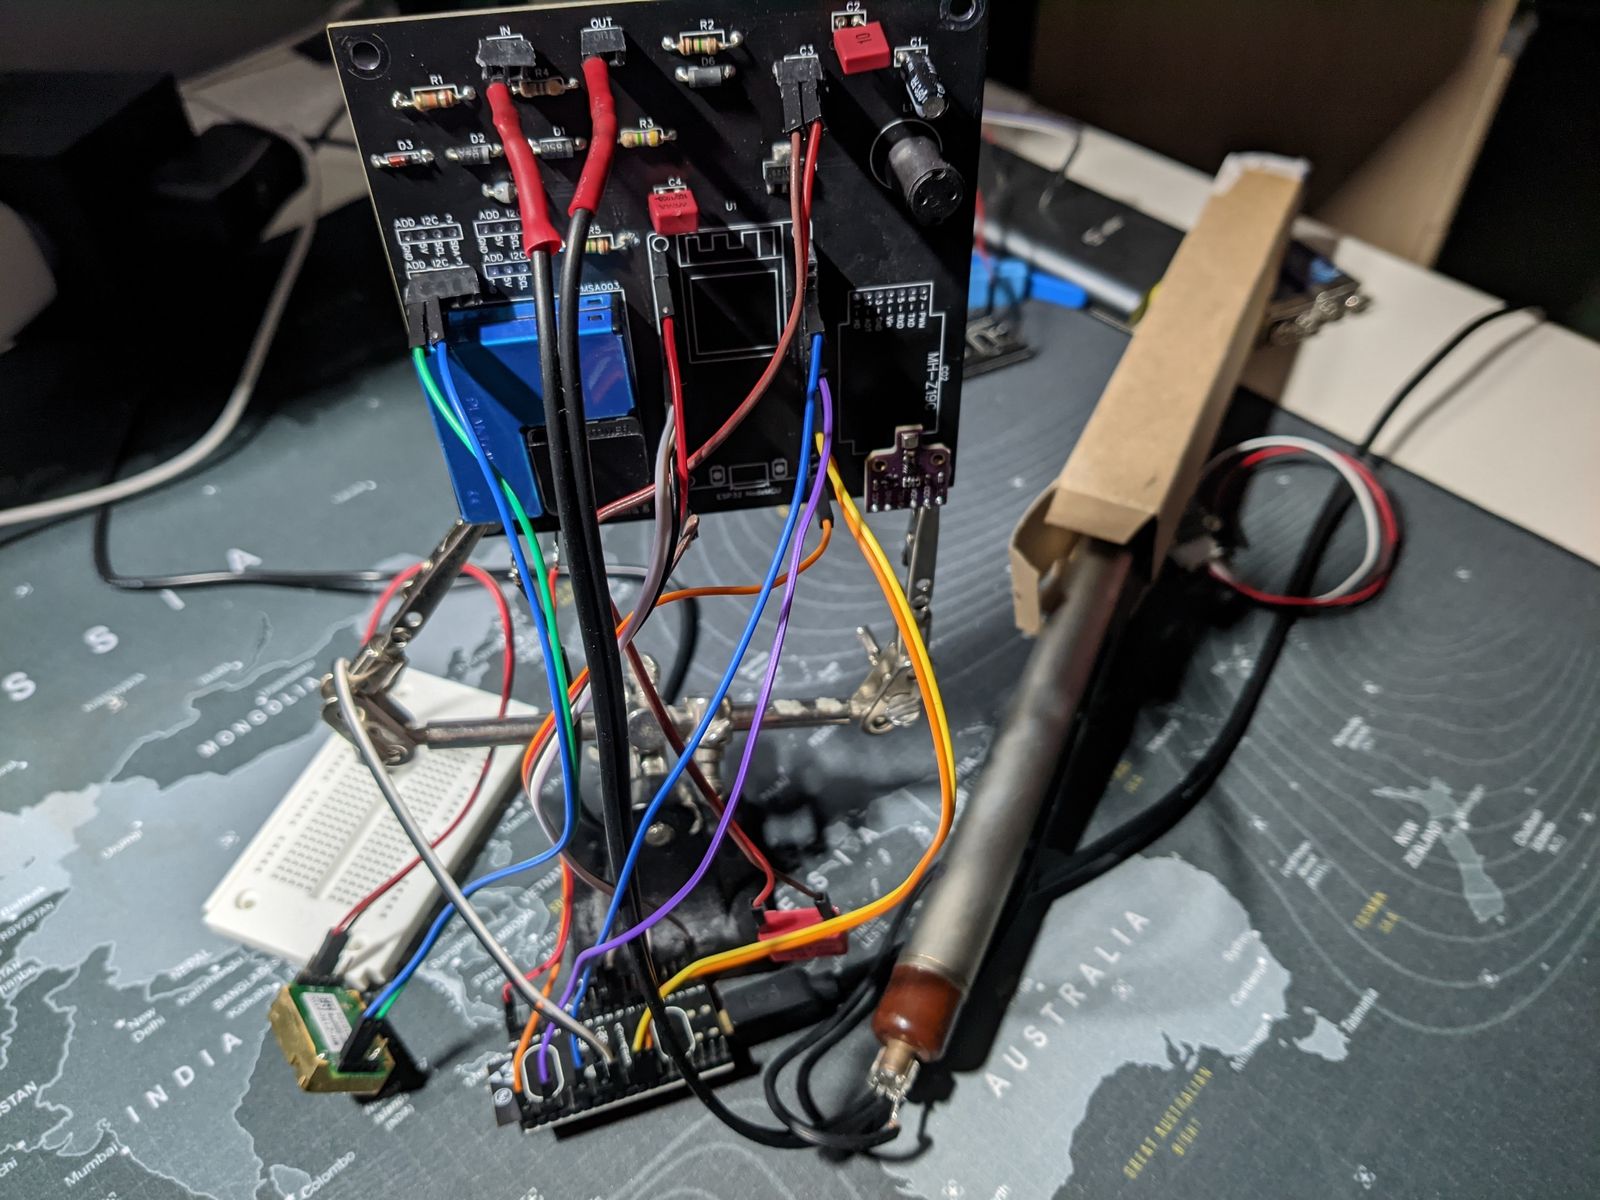
The PCB:
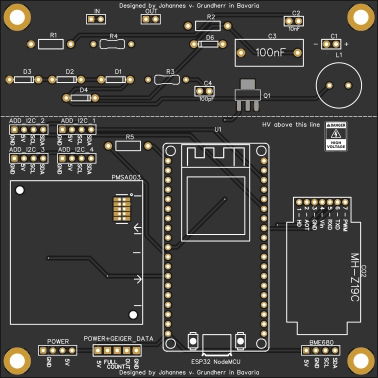
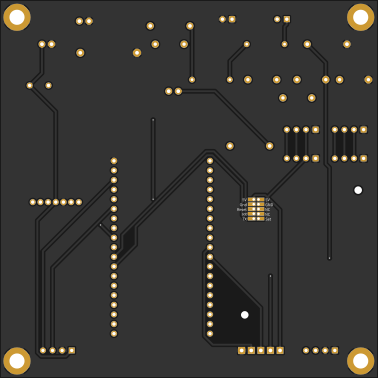
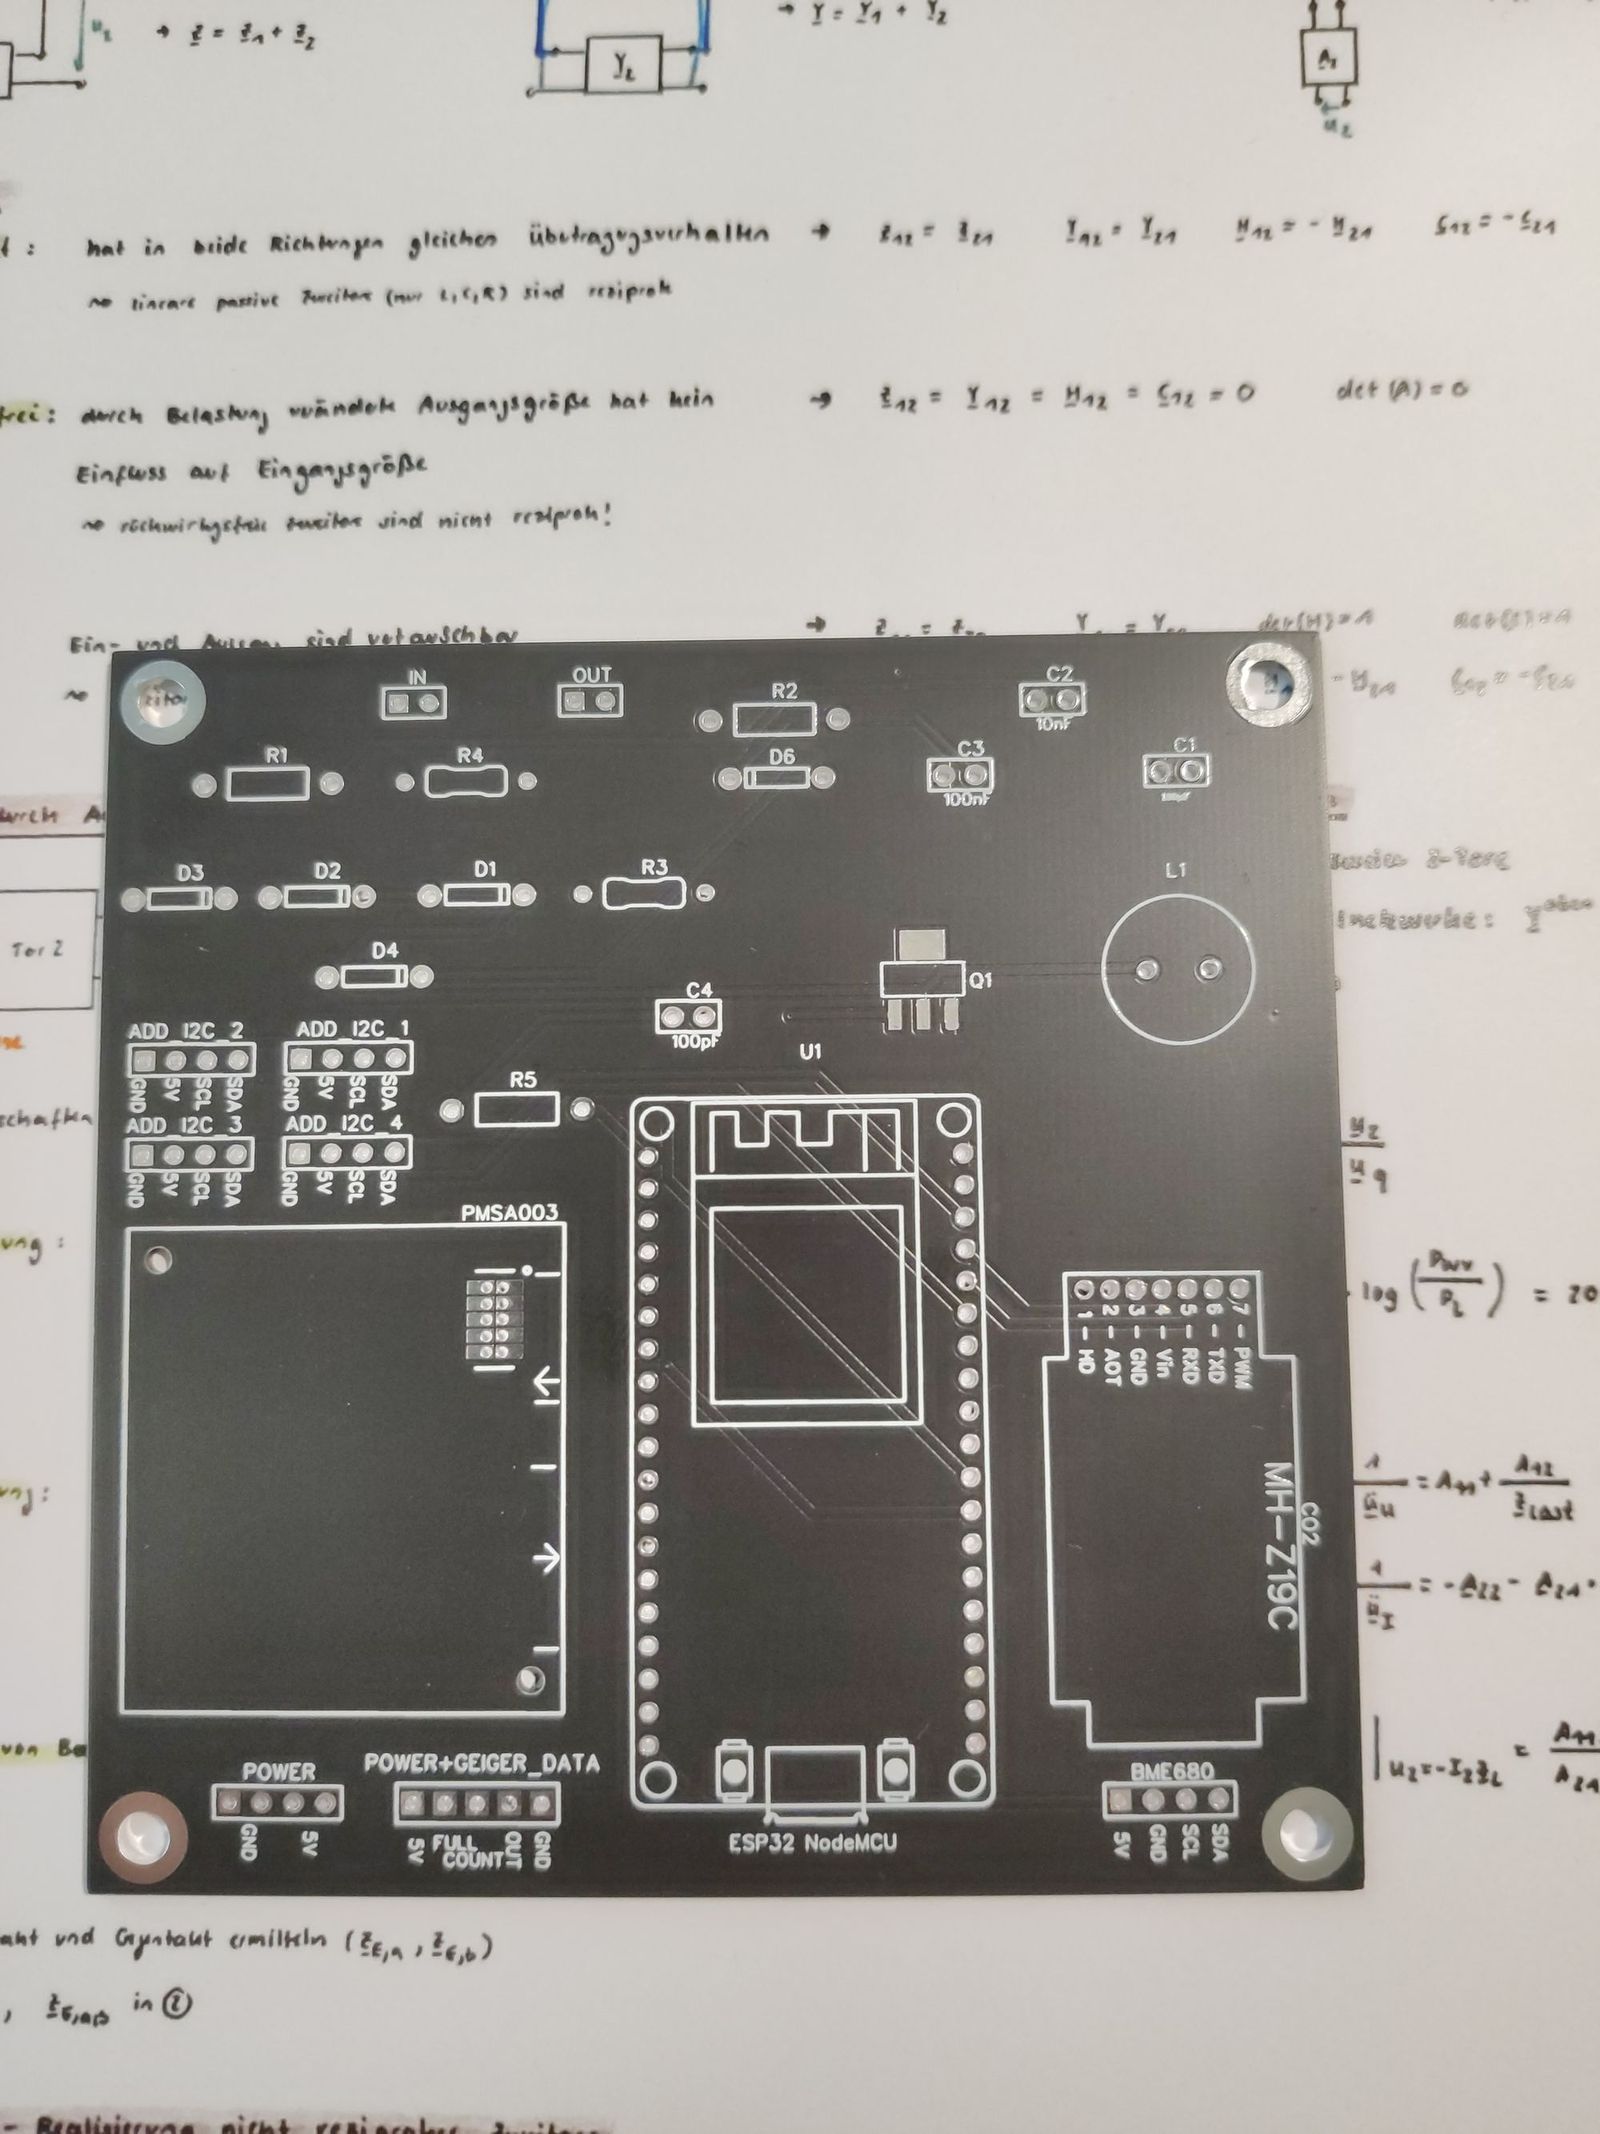
Beautiful, isn’t it?
Looking back, I realize that there were three errors in my design. Firstly, I used the wrong footprints for cap C3 and the CO2 sensor. Secondly, I mistakenly bought an incompatible ESP32, which resulted in the need for jumpers.
 So how does the software work?
I have already explained how the tube is driven. Apart from that, the ESP32 collects the sensor data and sends it to my MQTT broker.
Since the “backend” is somewhat complicated I can only forward you too Andreas Spiess’s perfect explanation of it: https://www.youtube.com/watch?v=JdV4x925au0
You can find the Arduino sketch in this projects Github.
Analyzing the data: Since we are using mqtt and InfluxDB, we can easily plot the data with the popular graphing tool Grafana:
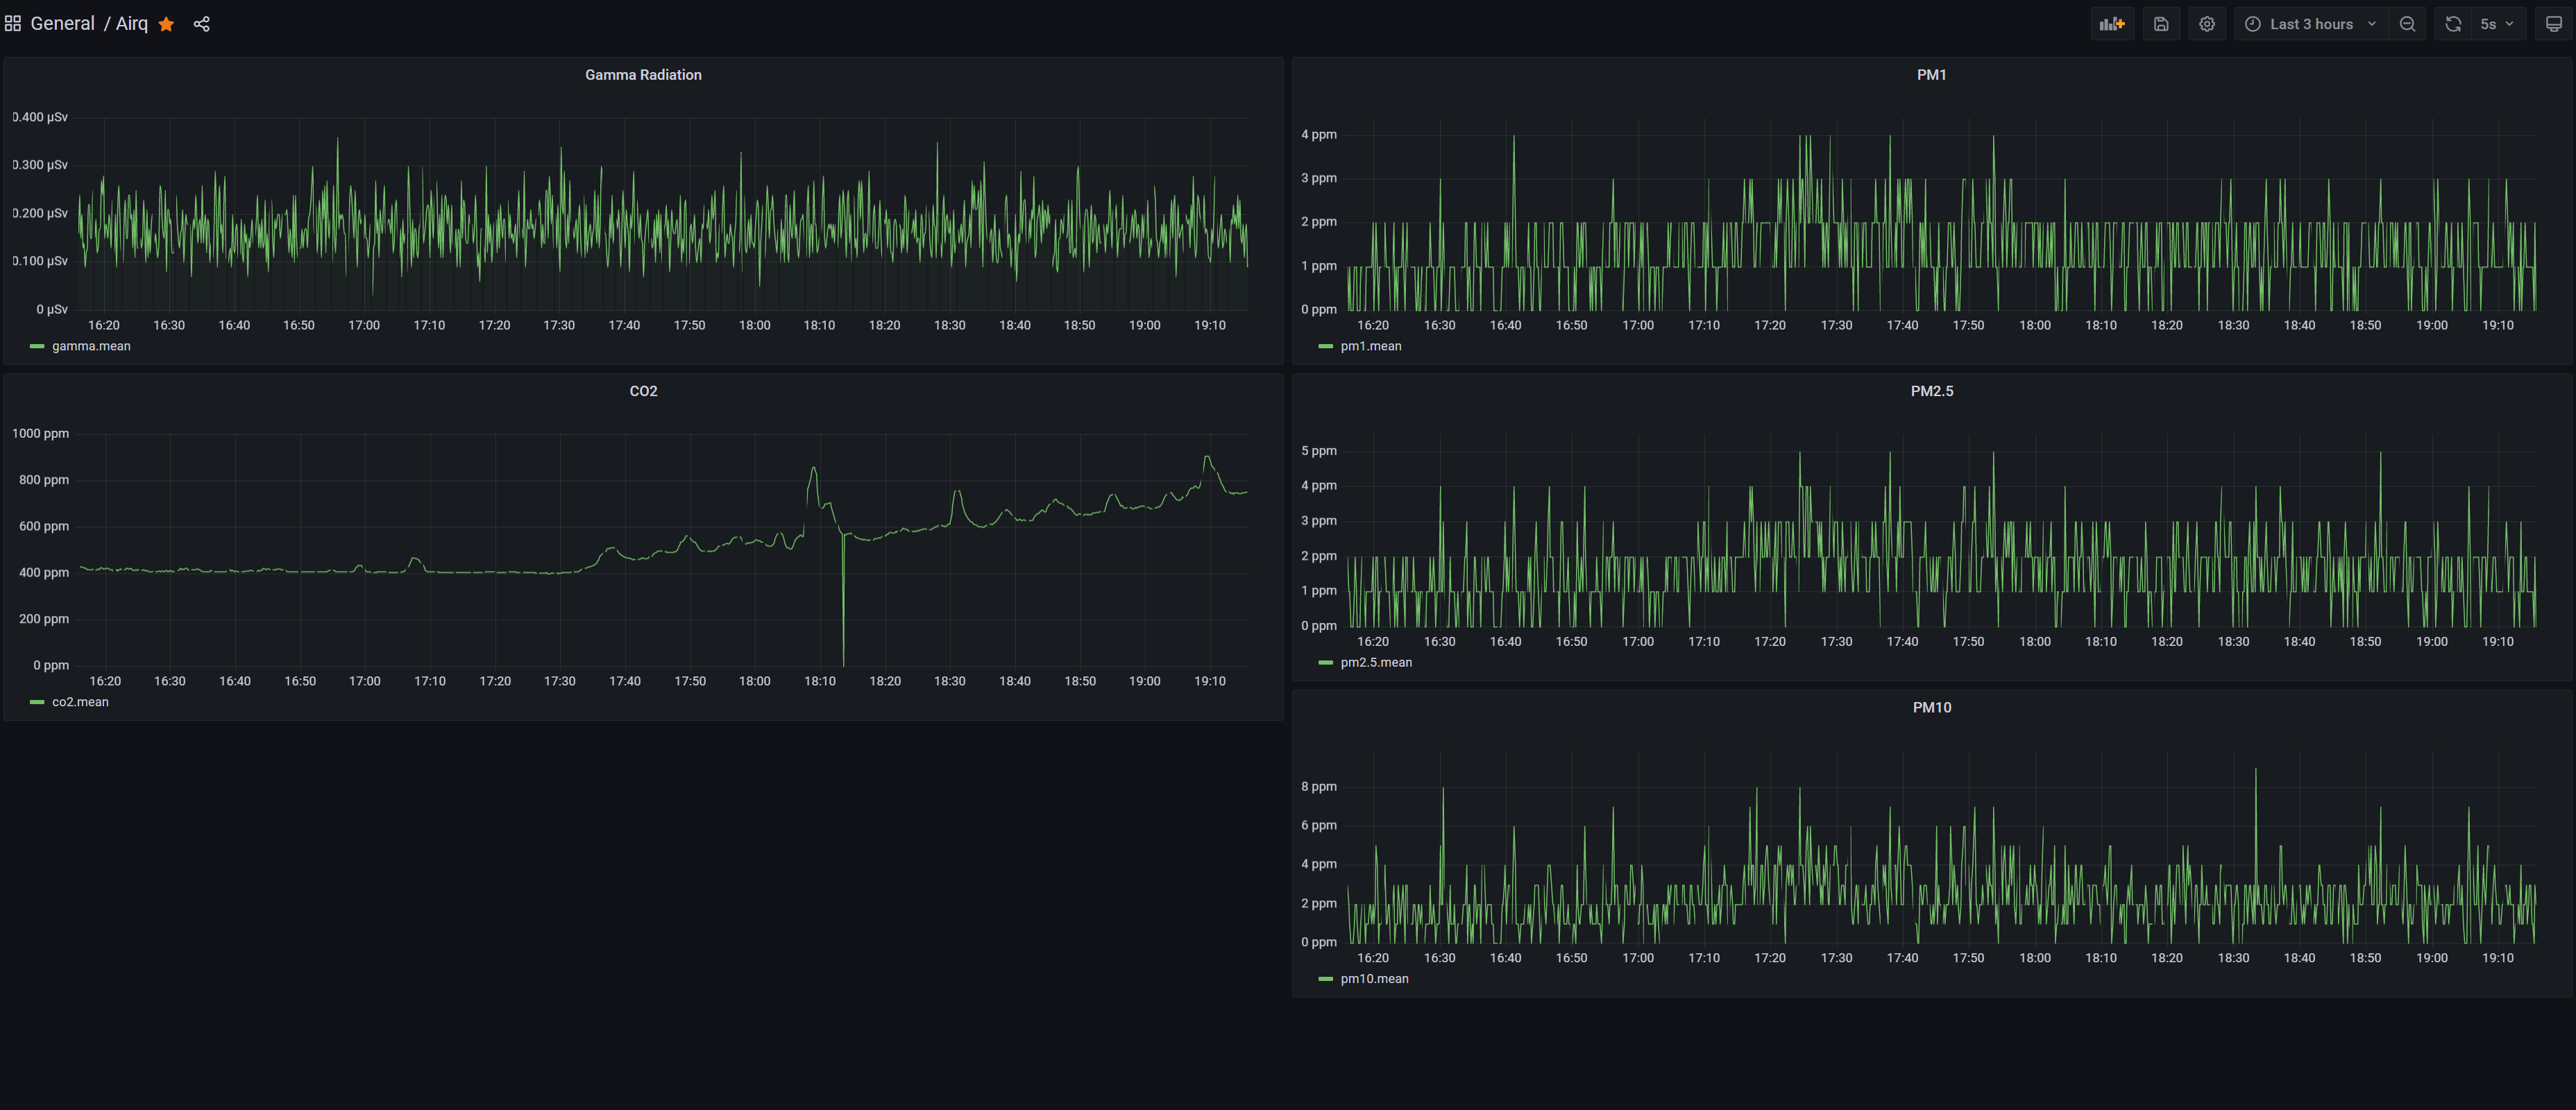
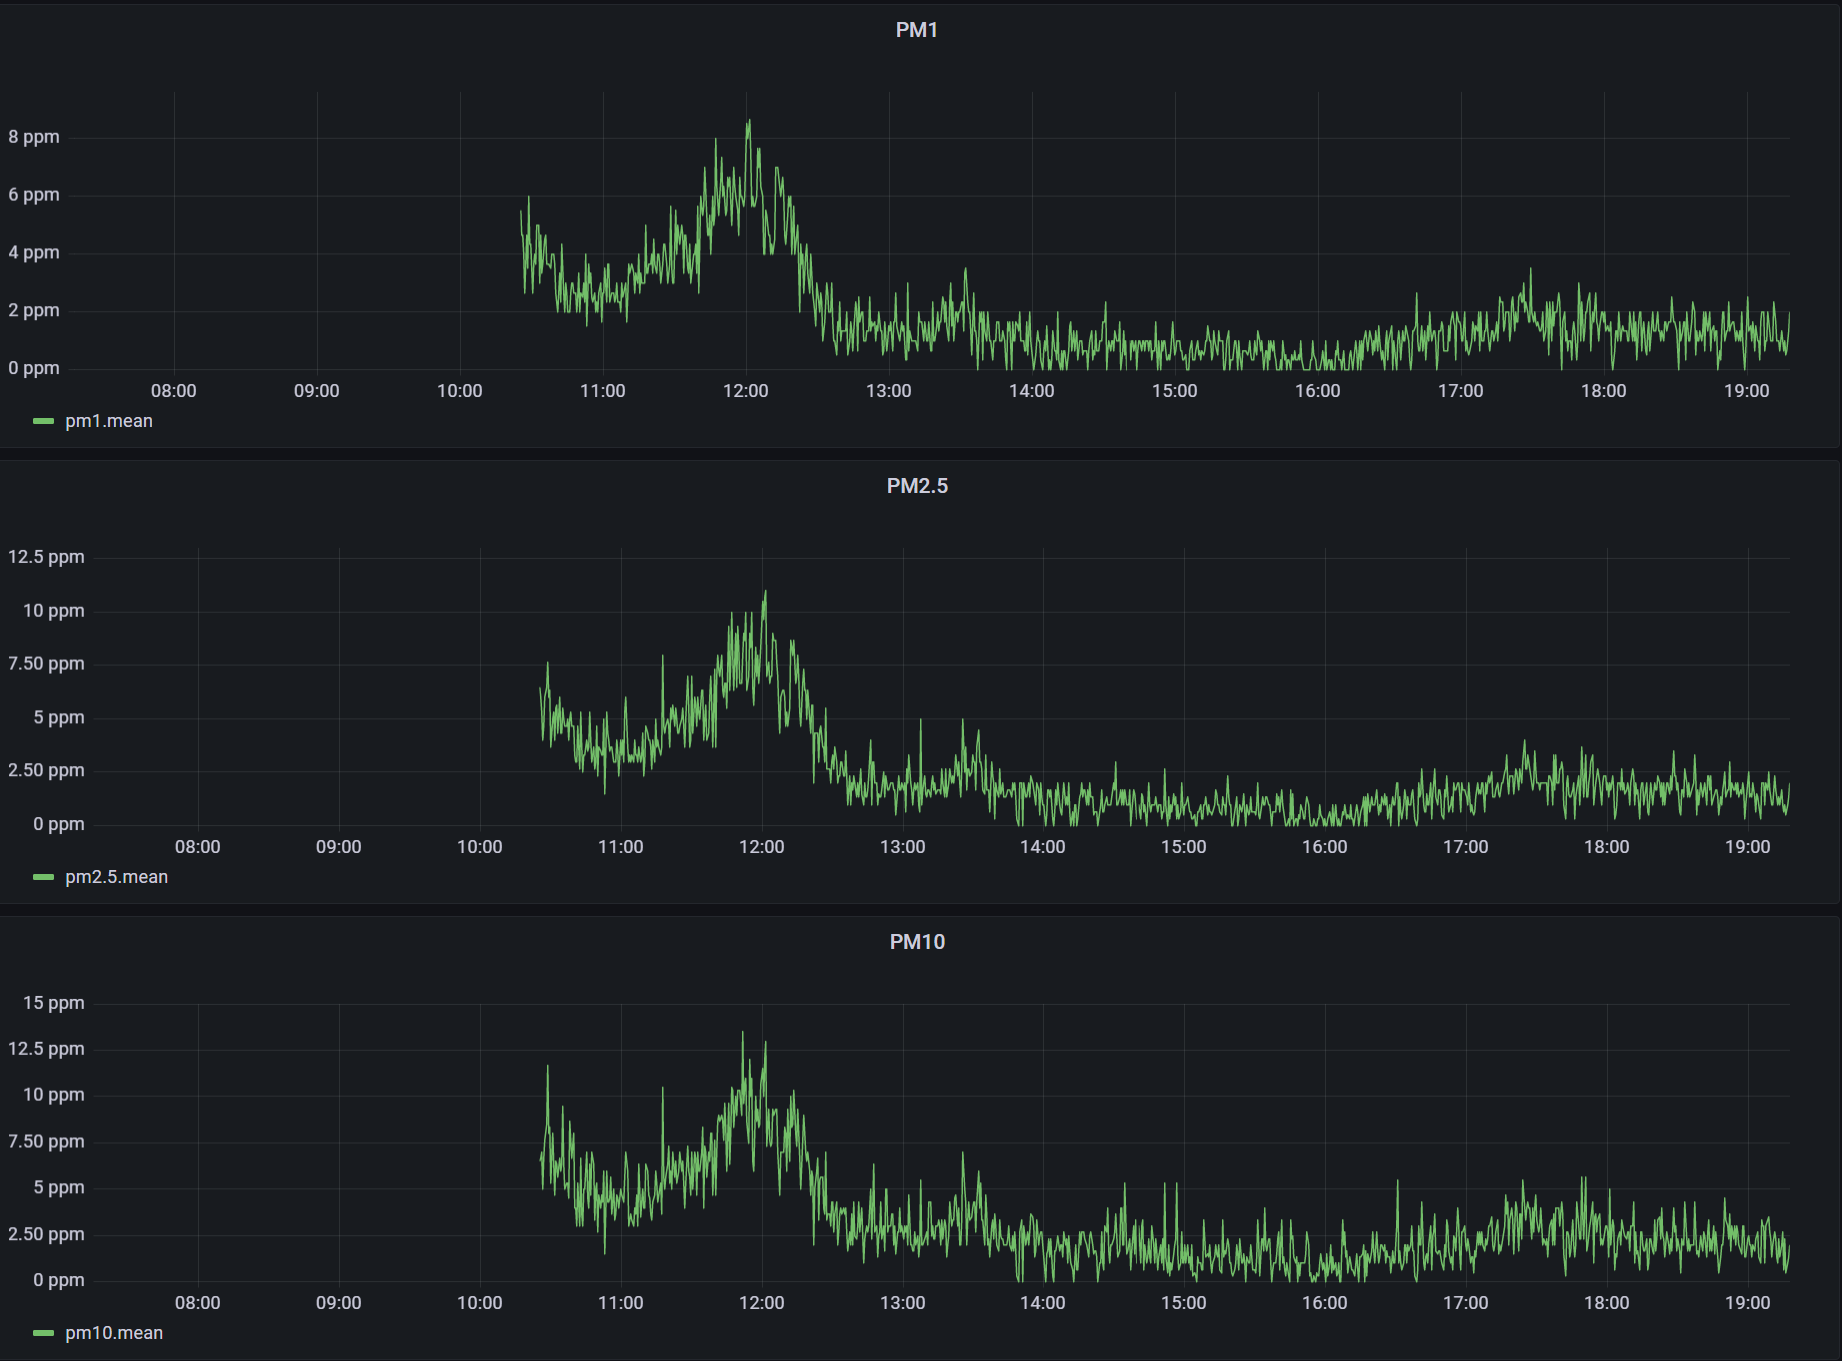
The last plot illustrates the effect of lawn mowing on the fine particle sensor located about 10 meters away from the room’s window, but the levels remain within the healthy range.
On the lower left, the CO2 chart shows the levels during the time of writing, with occasional 30-second windows opened.
Finally, the top left chart represents the gamma-ray readings in micro Sievert, showing typical background radiation levels and no signs of radon thus far, which is a relief.
Conclusion:
Apart from putting my heart at ease, which was worrying about the potential lung cancer due to poor indoor air quality, I have also gained a wealth of knowledge about the various components that affect our air quality, such as CO2 and ionizing radiation. Although there were a few mistakes in the PCB design due to a rushed order, it served its purpose as a prototype, and if it works, then it works.
On the software and hardware side, I am amazed at the capabilities of the ESP32, which costs only $5 and is much more powerful than an Arduino. I plan to use it in future projects, such as wirelessly monitoring the soil moisture of my plants or using it with a long-distance LoRaWAN module and a camera to monitor local wildlife.