Monitoring the air


Indoor air quality - you probably never taught about this, but it's just as, if not more important than outdoor air quality, since most people spend more than half of their day indoors. So how is the air?
Quick Note: You can find this projects code and documentation on Github!
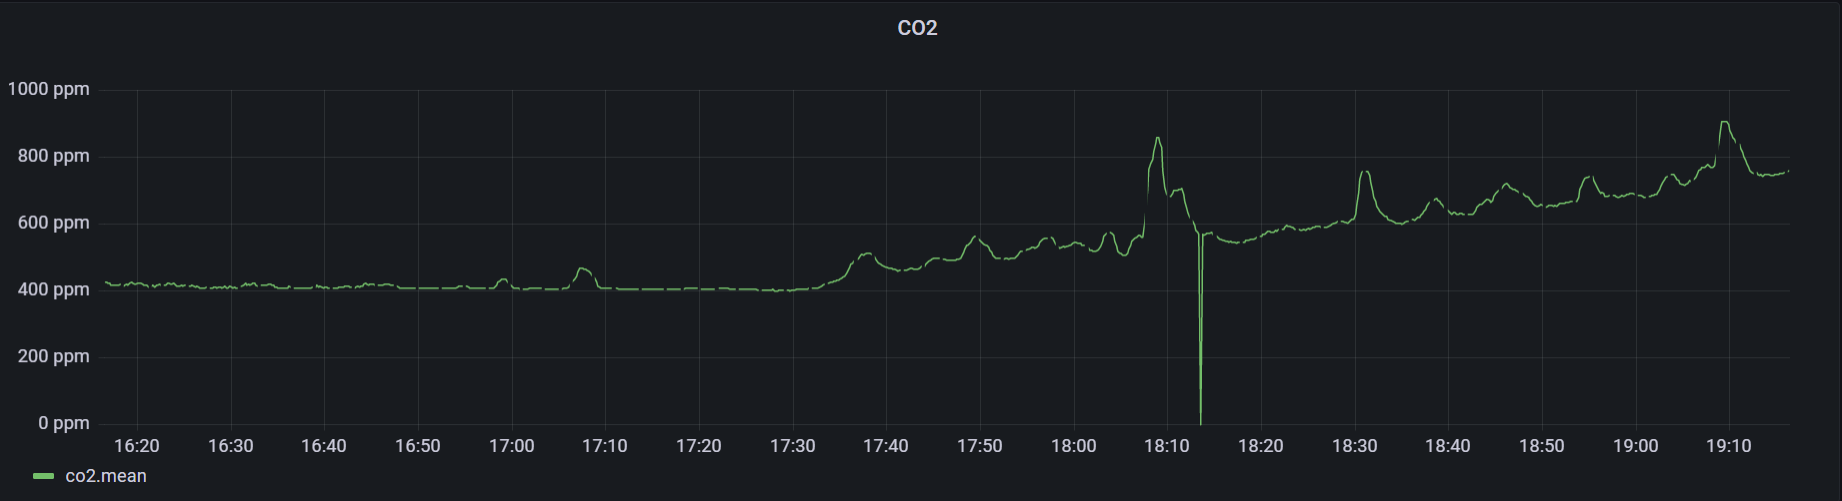
Well, lets quantify it: CO2 is the most important short-term indicator, its measured in ppm parts-per-million. If the level is too high you can't concentrate at first and then get dizzy and sleepy:
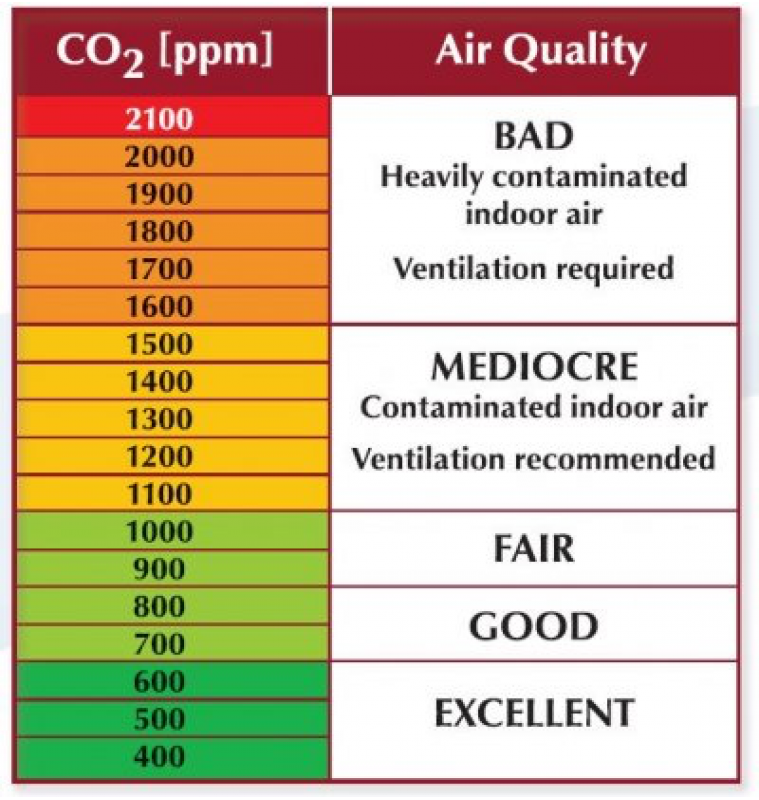
So how can we test it?
With a sensor of course, we will be using the MH-Z19C, it has a range from 400-500ppm so the above chart fits perfectly in it.
Fine particles are not that important in the short term, but in the long term, it can have serious impacts on your health, its measured in particles per 0.1l of air:

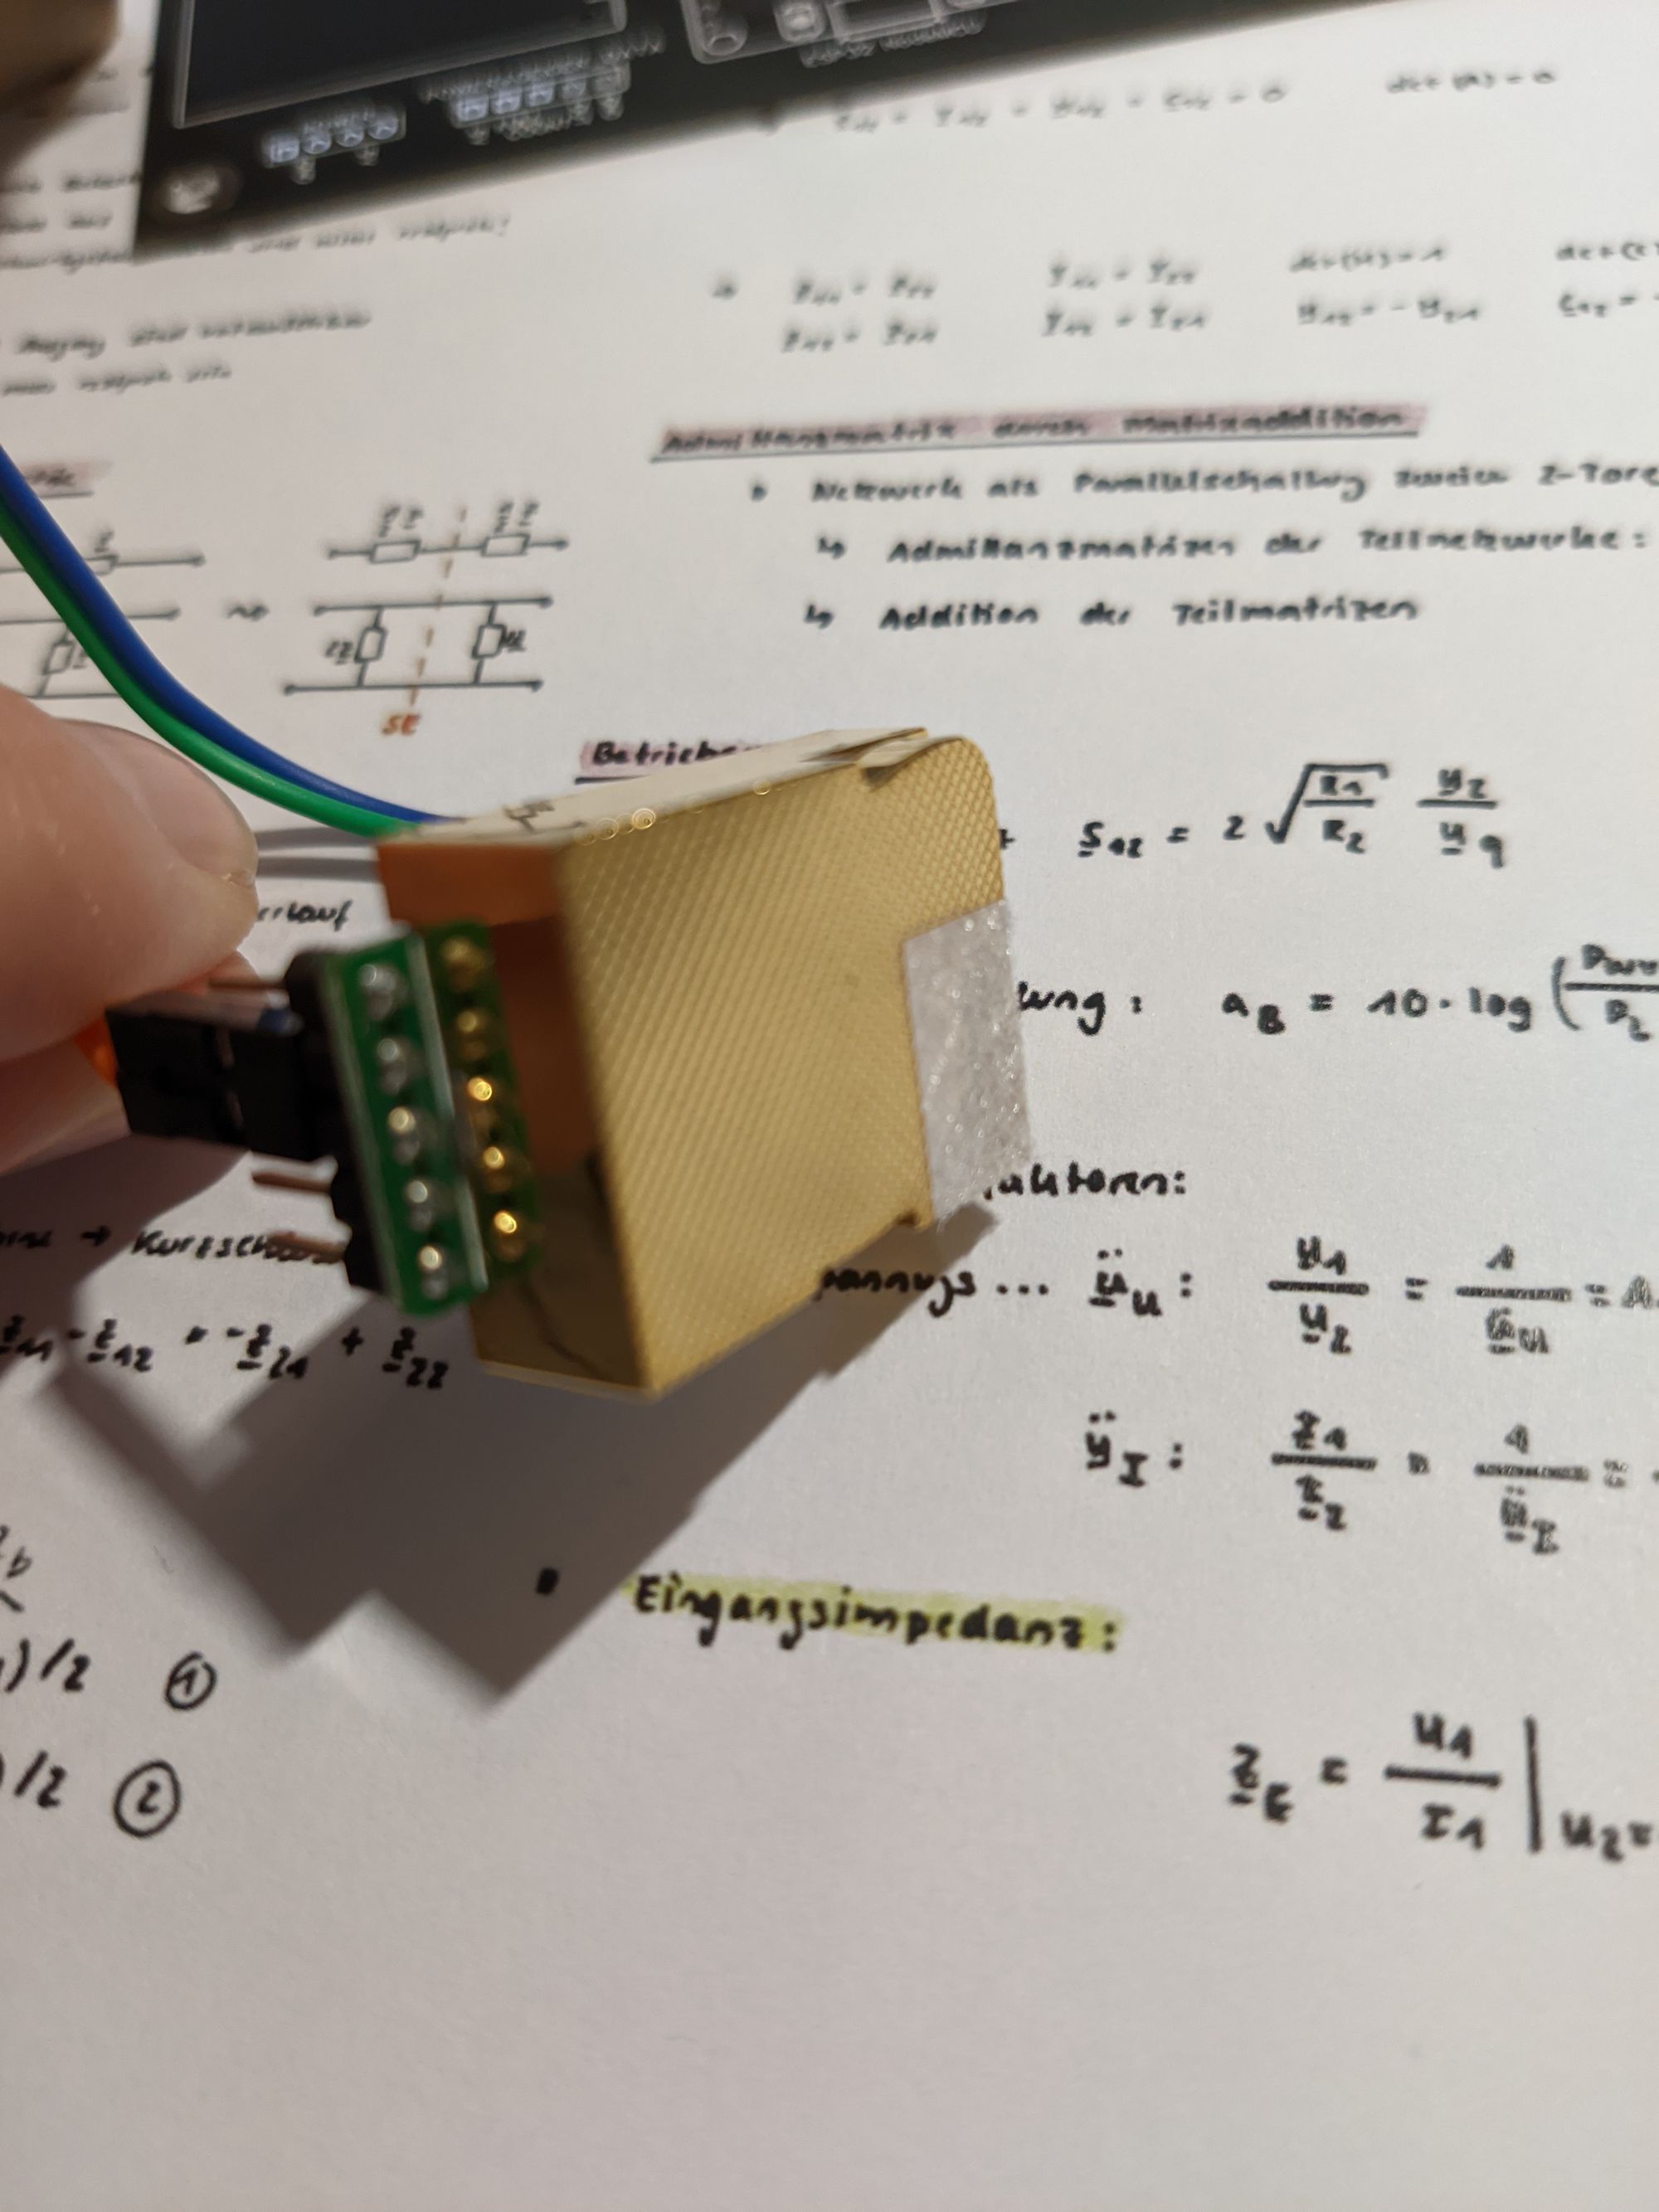
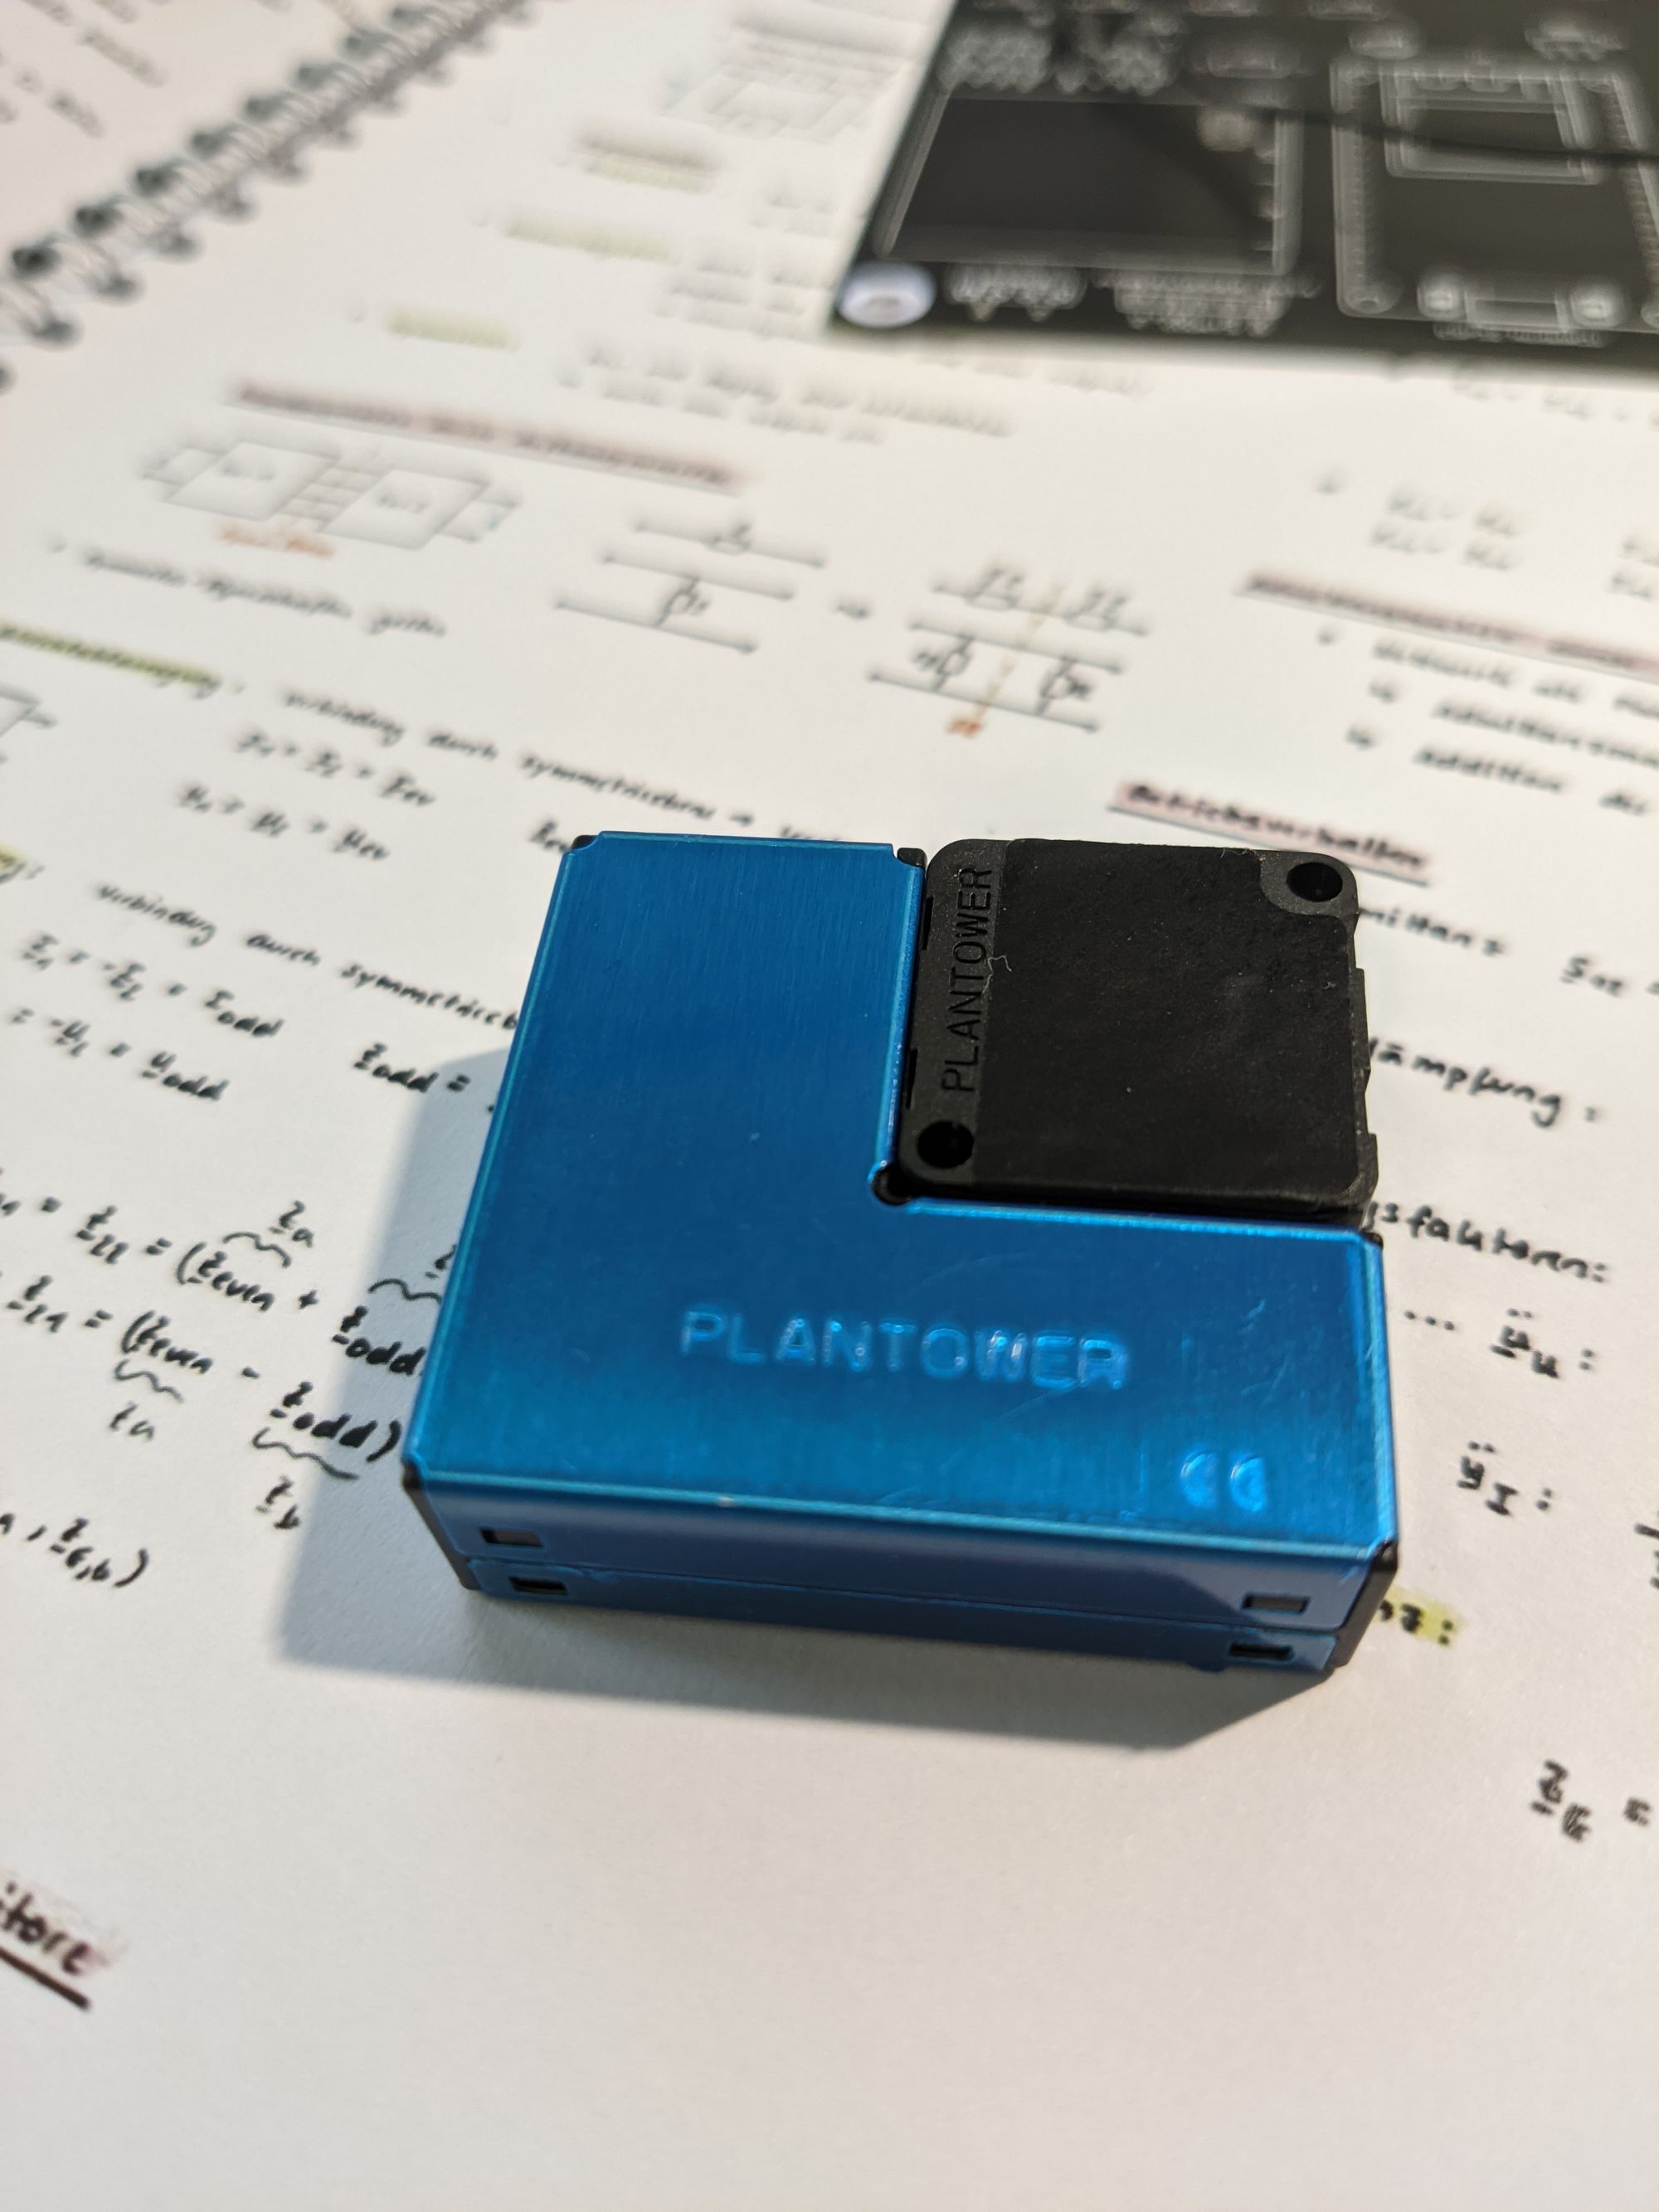
To sense these particles we are using the PMSA003 from Plantower:
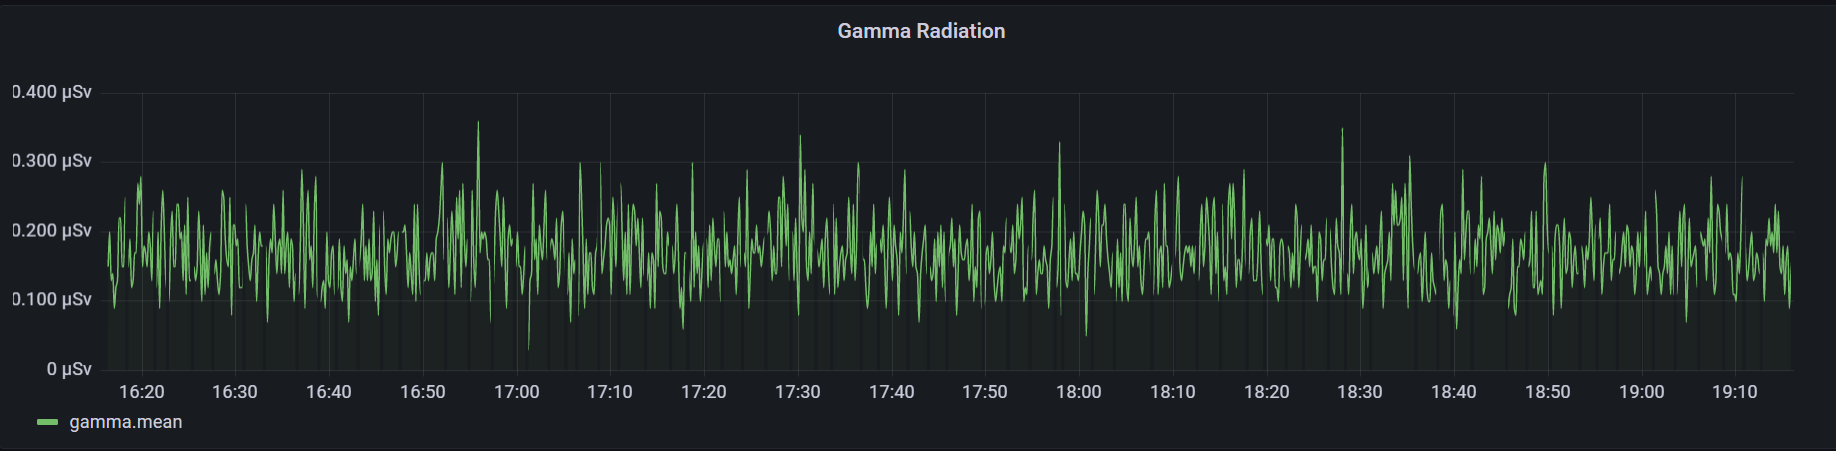
The last major Indicator I want to use and which is a bit unusual is radioactivity, having the very harmful Radon-gas in mind.
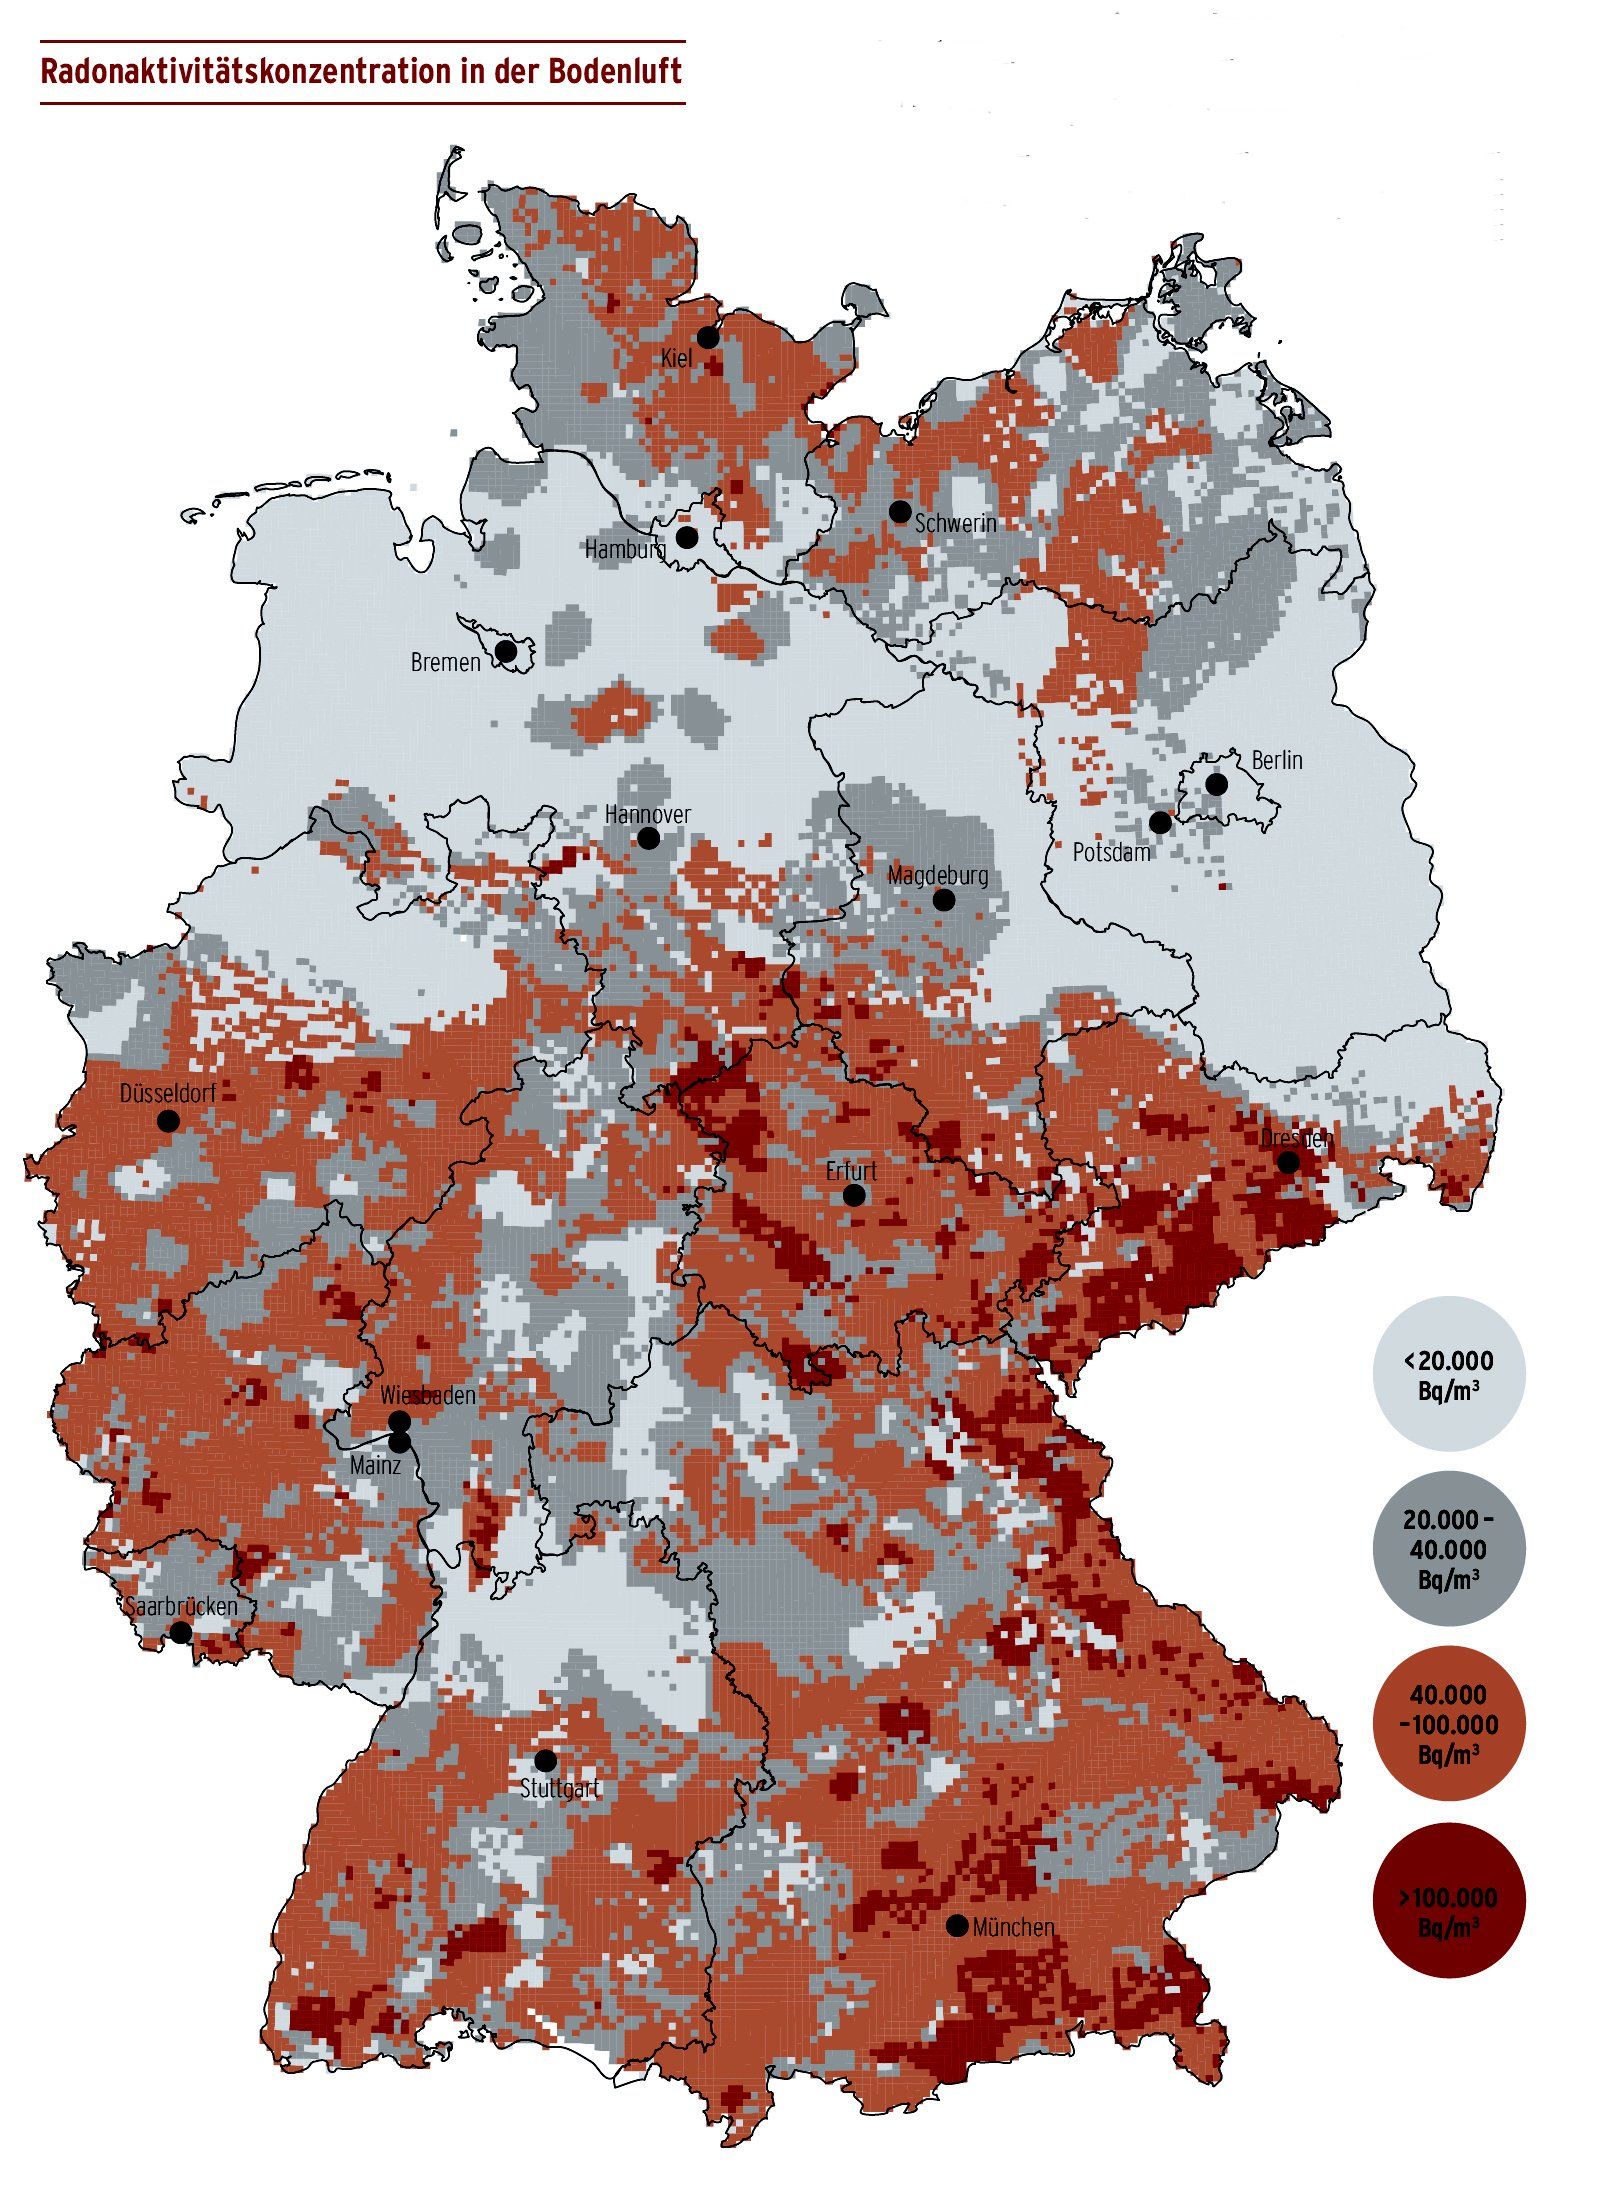
Two major obstacles lie in detecting Radon, it comes up in waves as decayed Uran from under the house and it only emits alpha rays.
If you are panicking right now while reading this, it should only concern you if you live in an older house which might have a porous foundation and you live in one of the red areas. For me it's both.
Why is detecting alpha radiation a Problem?
It's undetectable by a traditional Geiger-Müller tube, only with quite complicated systems, the modern one being optical recognition of "impacts" on a cmos-sensor.
So how do we detect radon? Well, we don't, we detect the gamma rays from the lead and bismuth:
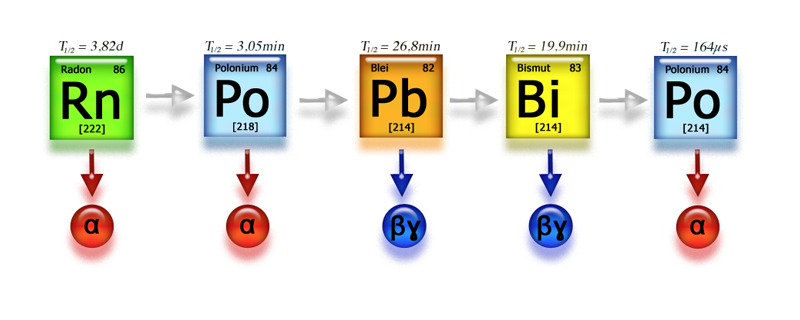
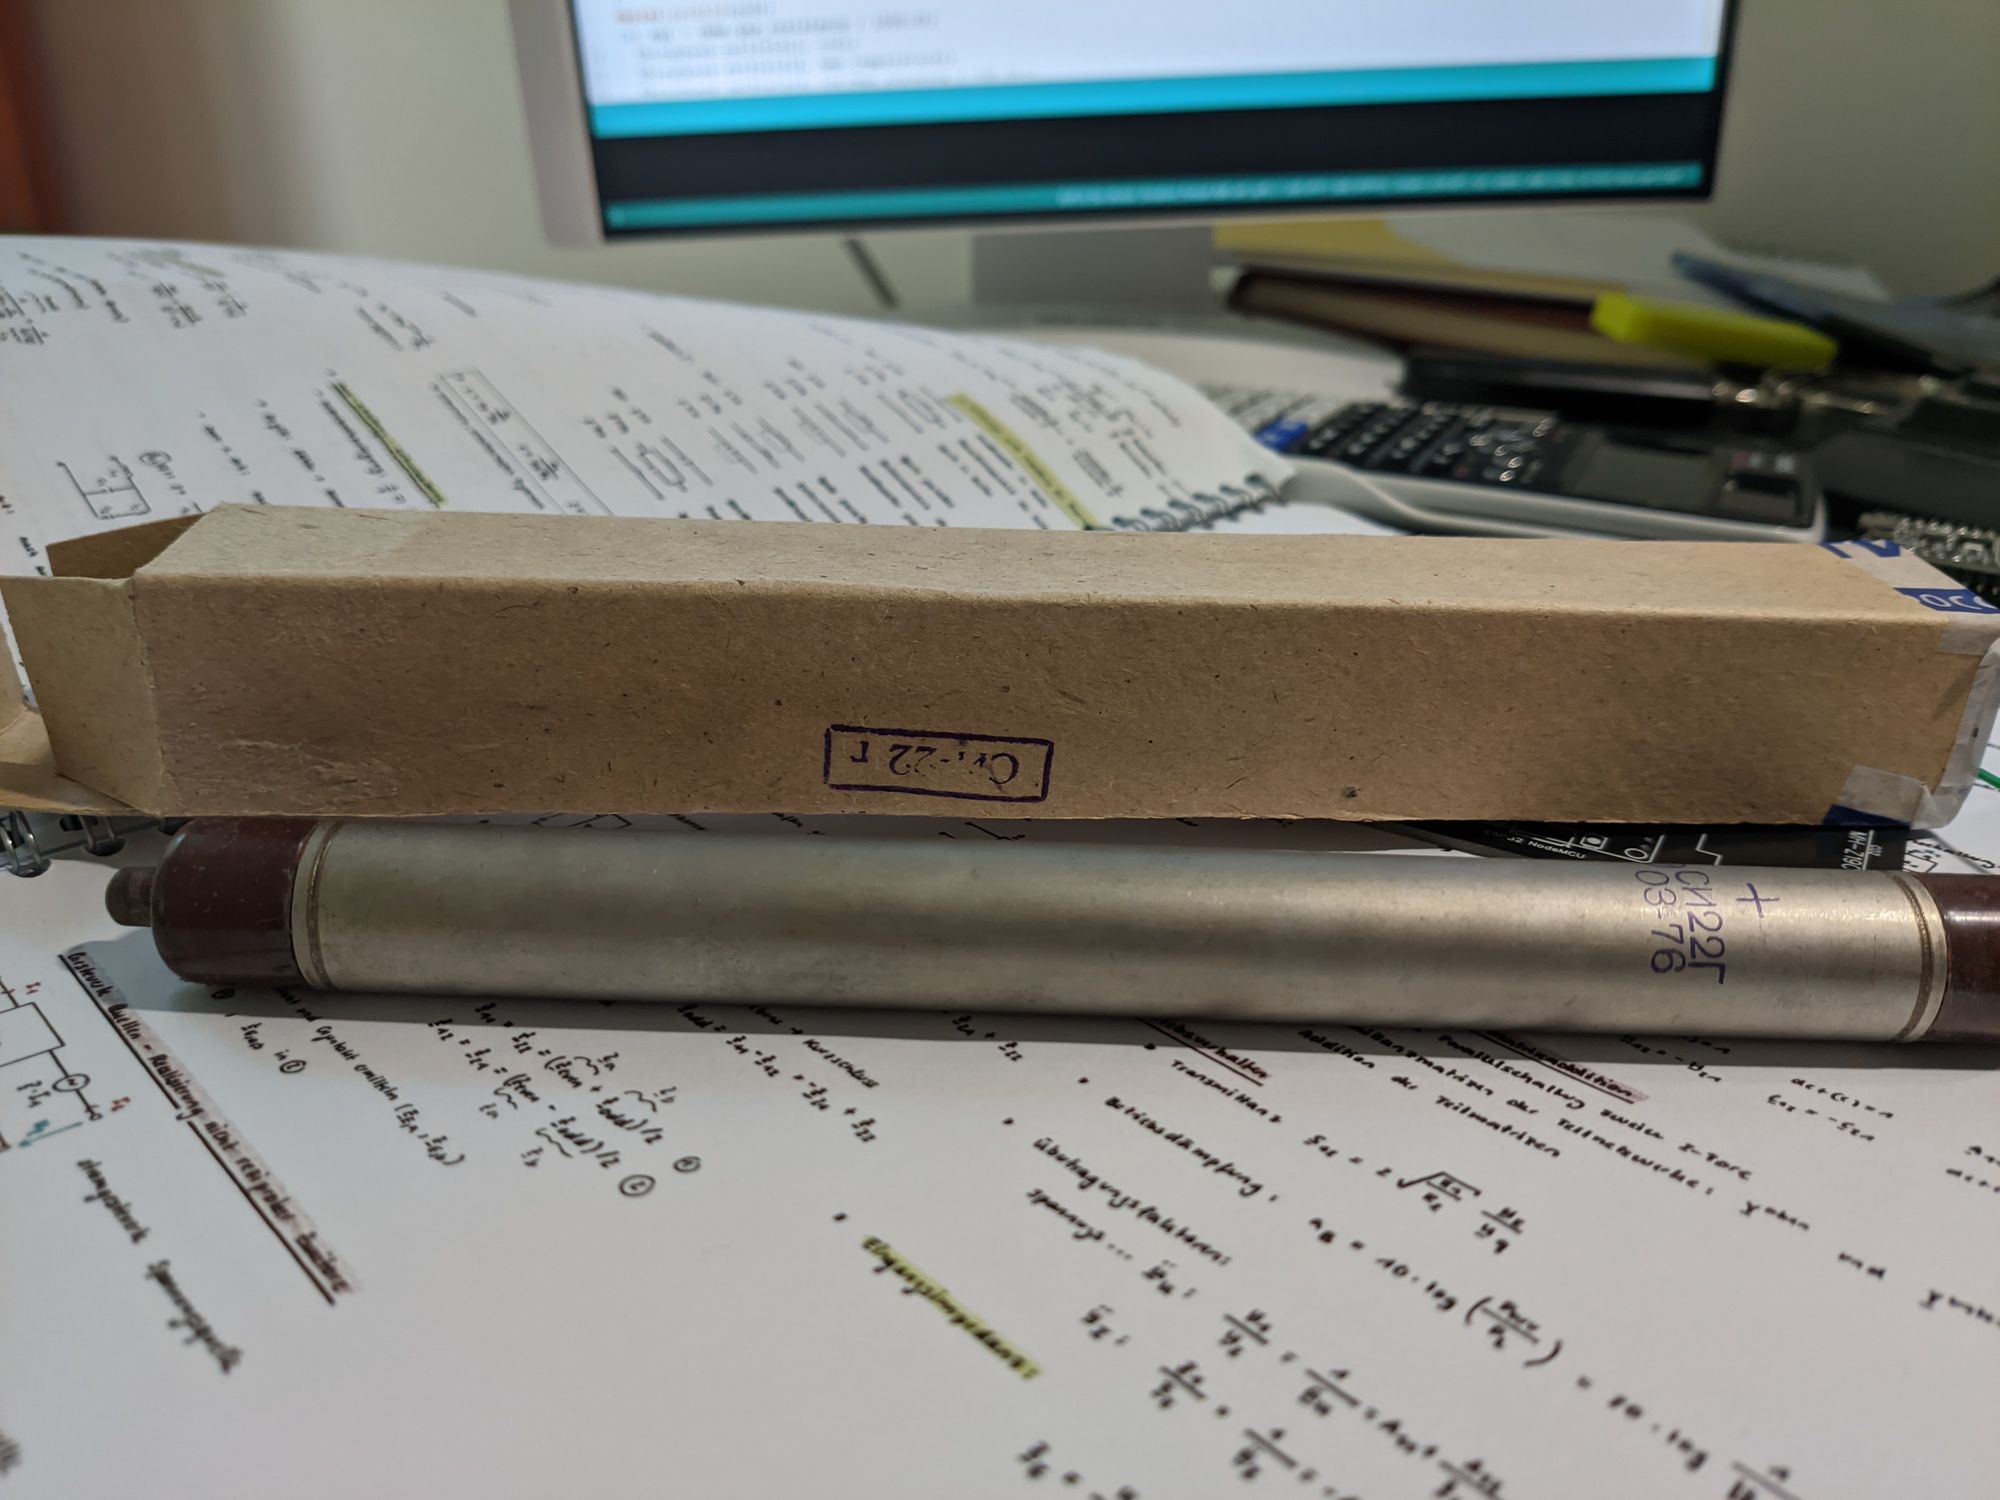
Since a Geiger-Müller Tube works only with very high voltages, mine takes 403V, the circuit is somewhat complicated, its partly inspired form the Multigeiger project on GitHub:

In short, we generate short pulses from the micro-controller(esp32), which generates very high voltages from the coil(Lenz's law). Stopping when the cap is charged. Then, once a gamma ray goes through the tube and making it inductive, the capacitor discharges for a microsecond which we detect.
That's basically it, the two sensors I wrote about earlier both use serial communication, the "simple" environmental sensor on the bottom right uses I2C.
For future expansion I added four more additional I2C headers, since you never know you need them until you do...
The PCB:


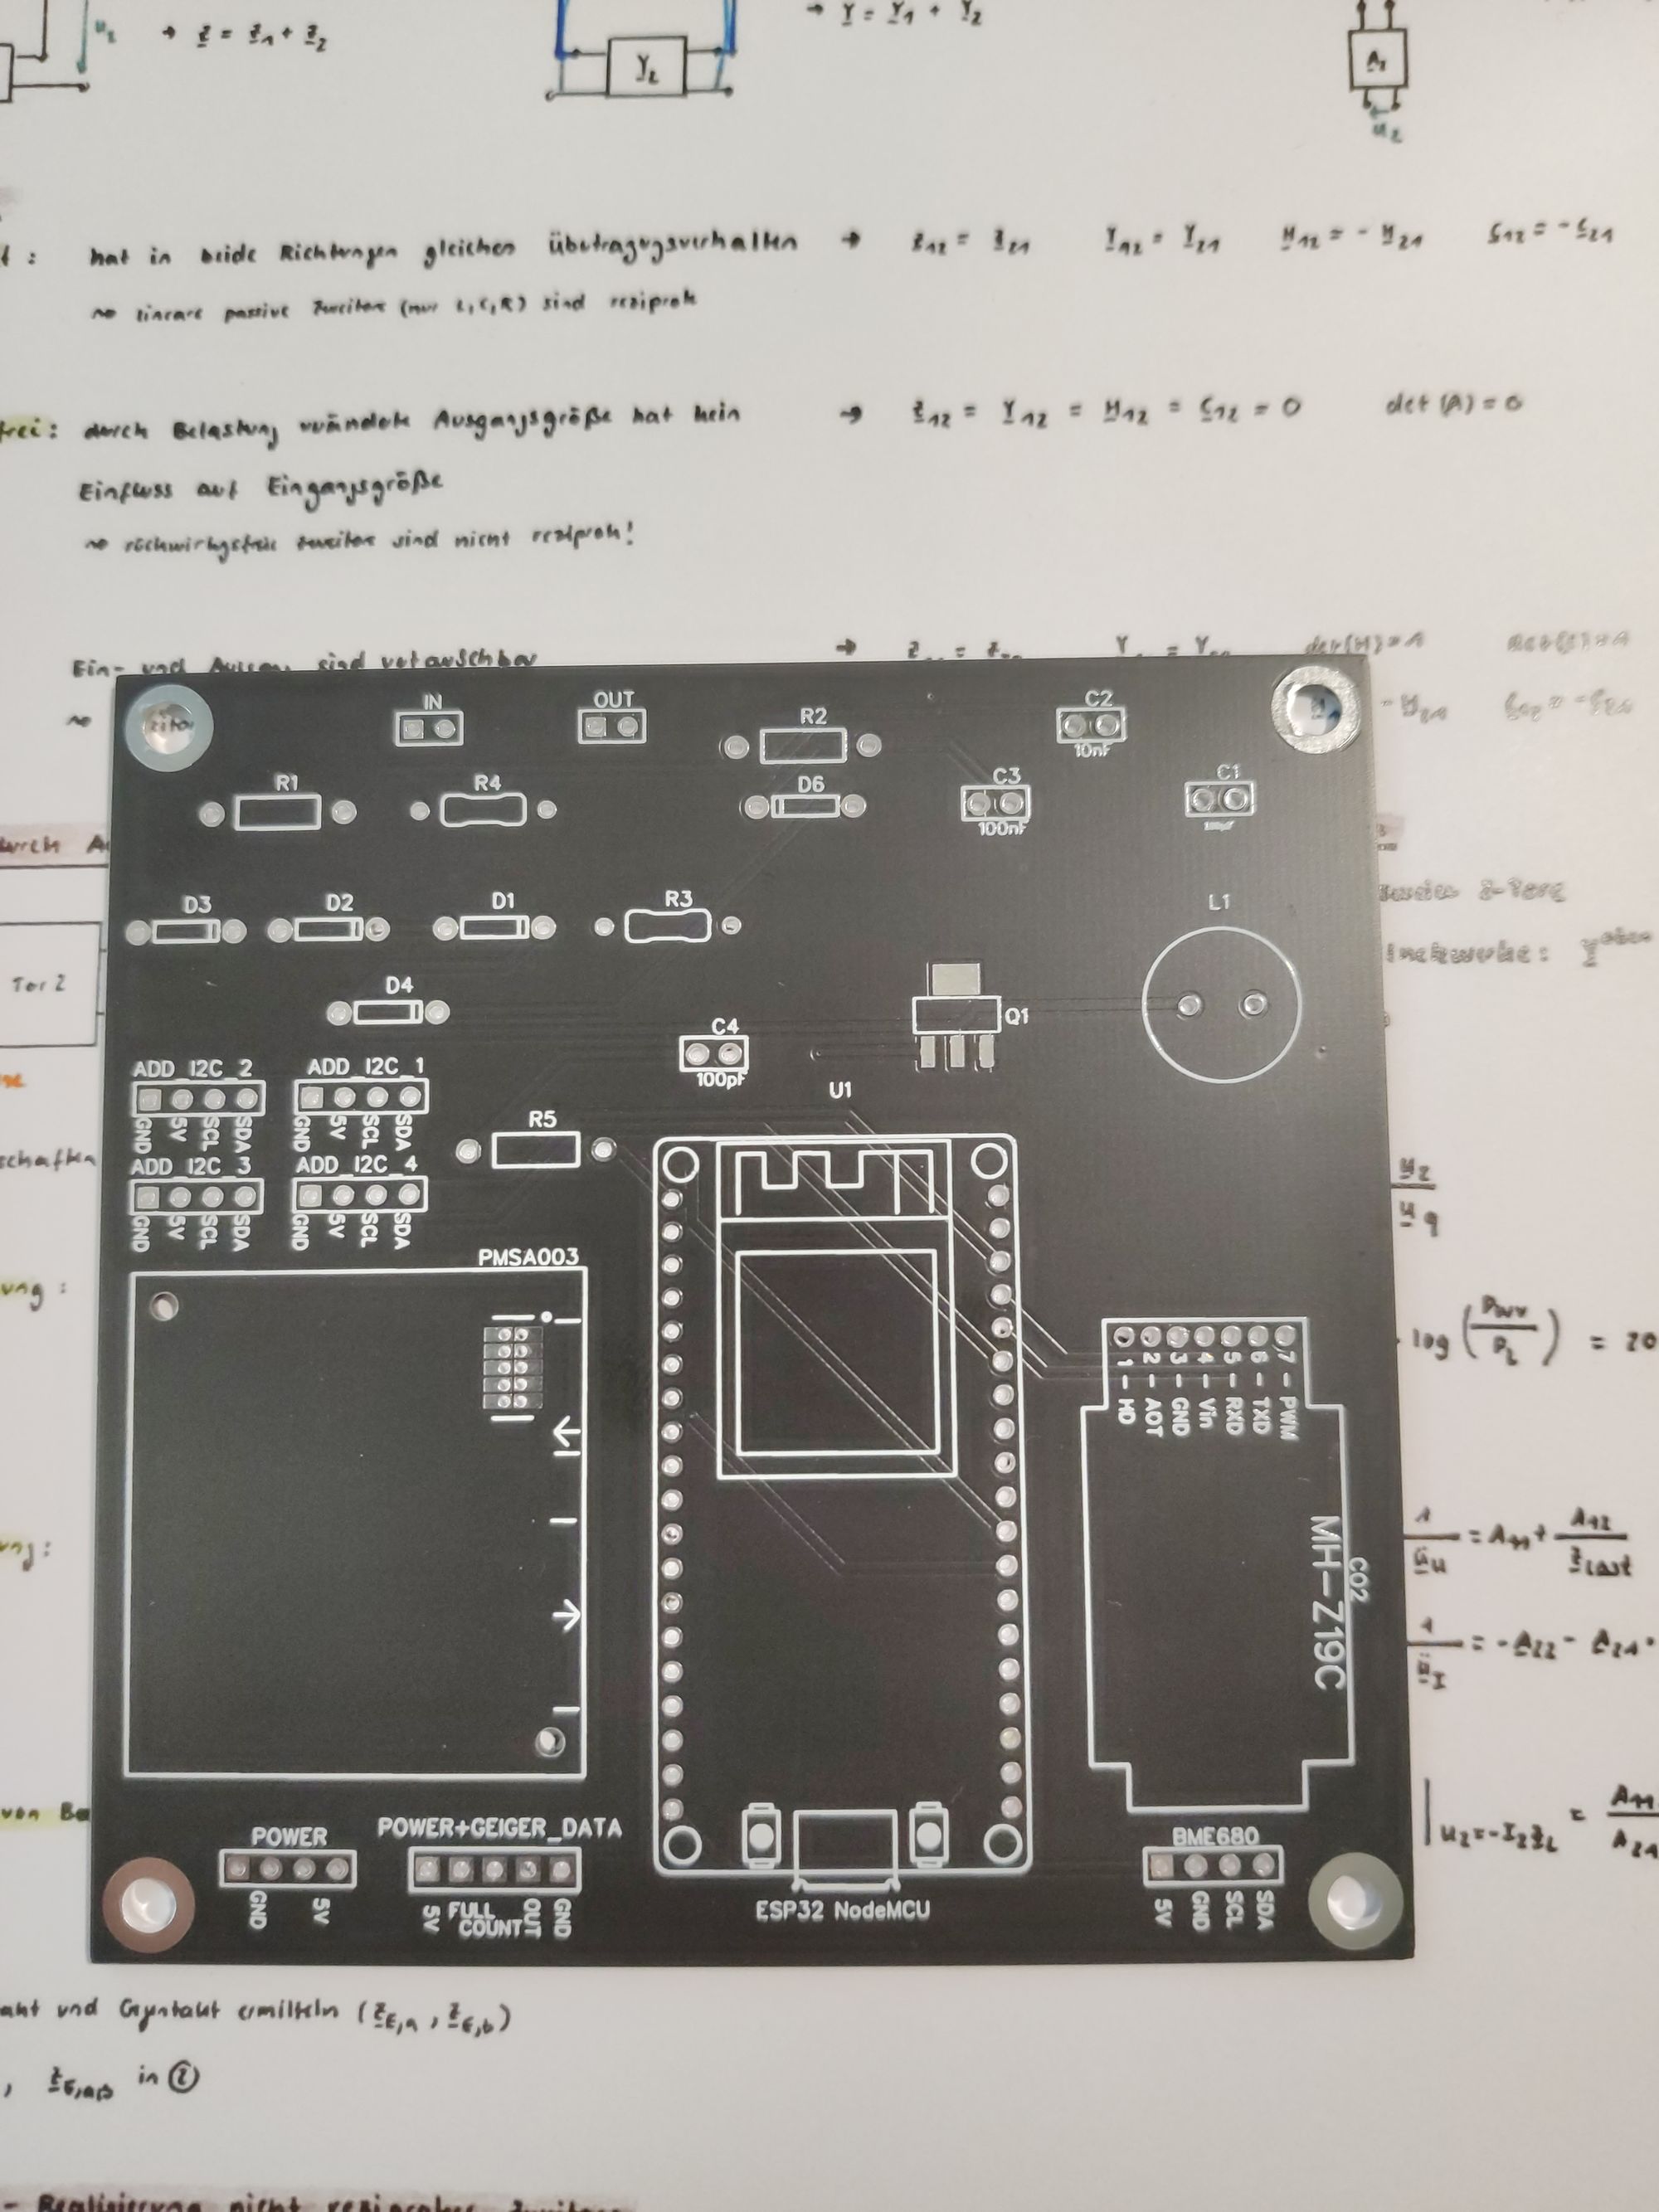
Beautiful, isn't it?
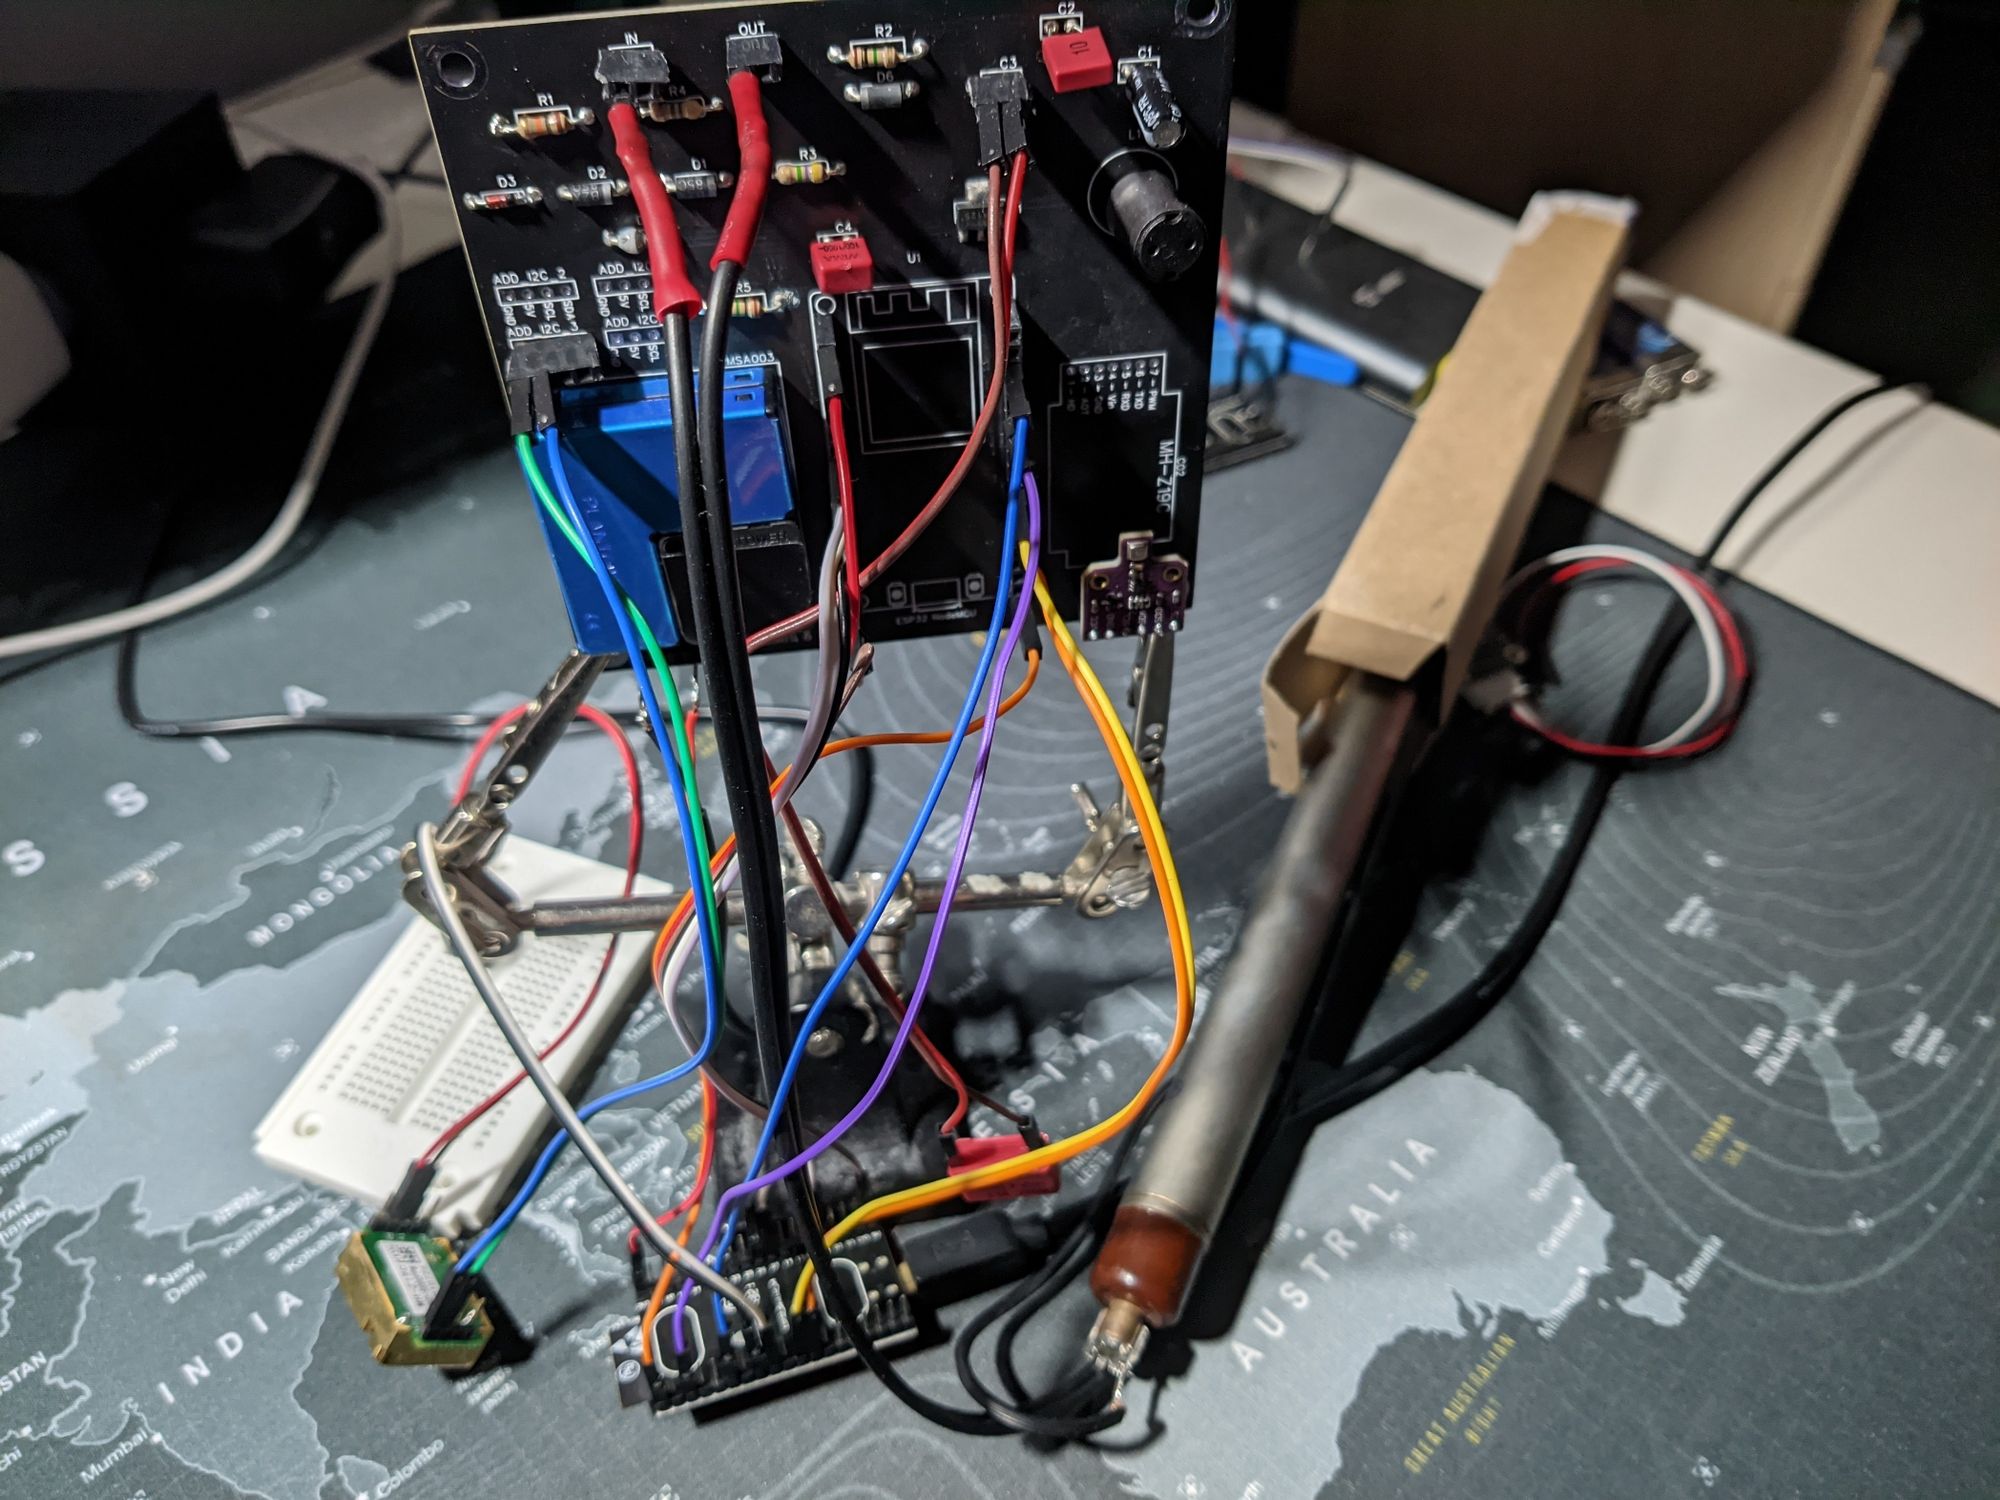
In retrospect I made three mistakes when designing it, cap C3 and the CO2 Sensor have the wrong footprints and I bought the wrong esp32, which is not pin-compatible to the one I planned for. So please forgive all the jumpers:
So how does the software work?
I already explained how the tube is driven, apart from that the esp32 just collects the sensors data and sends it off to my mqtt broker.
Since the "backend" is somewhat complicated I can only forward you too Andreas Spiess's perfect explanation of it: https://www.youtube.com/watch?v=JdV4x925au0
You can find the Arduino sketch in this projects Github.
Analyzing the data:
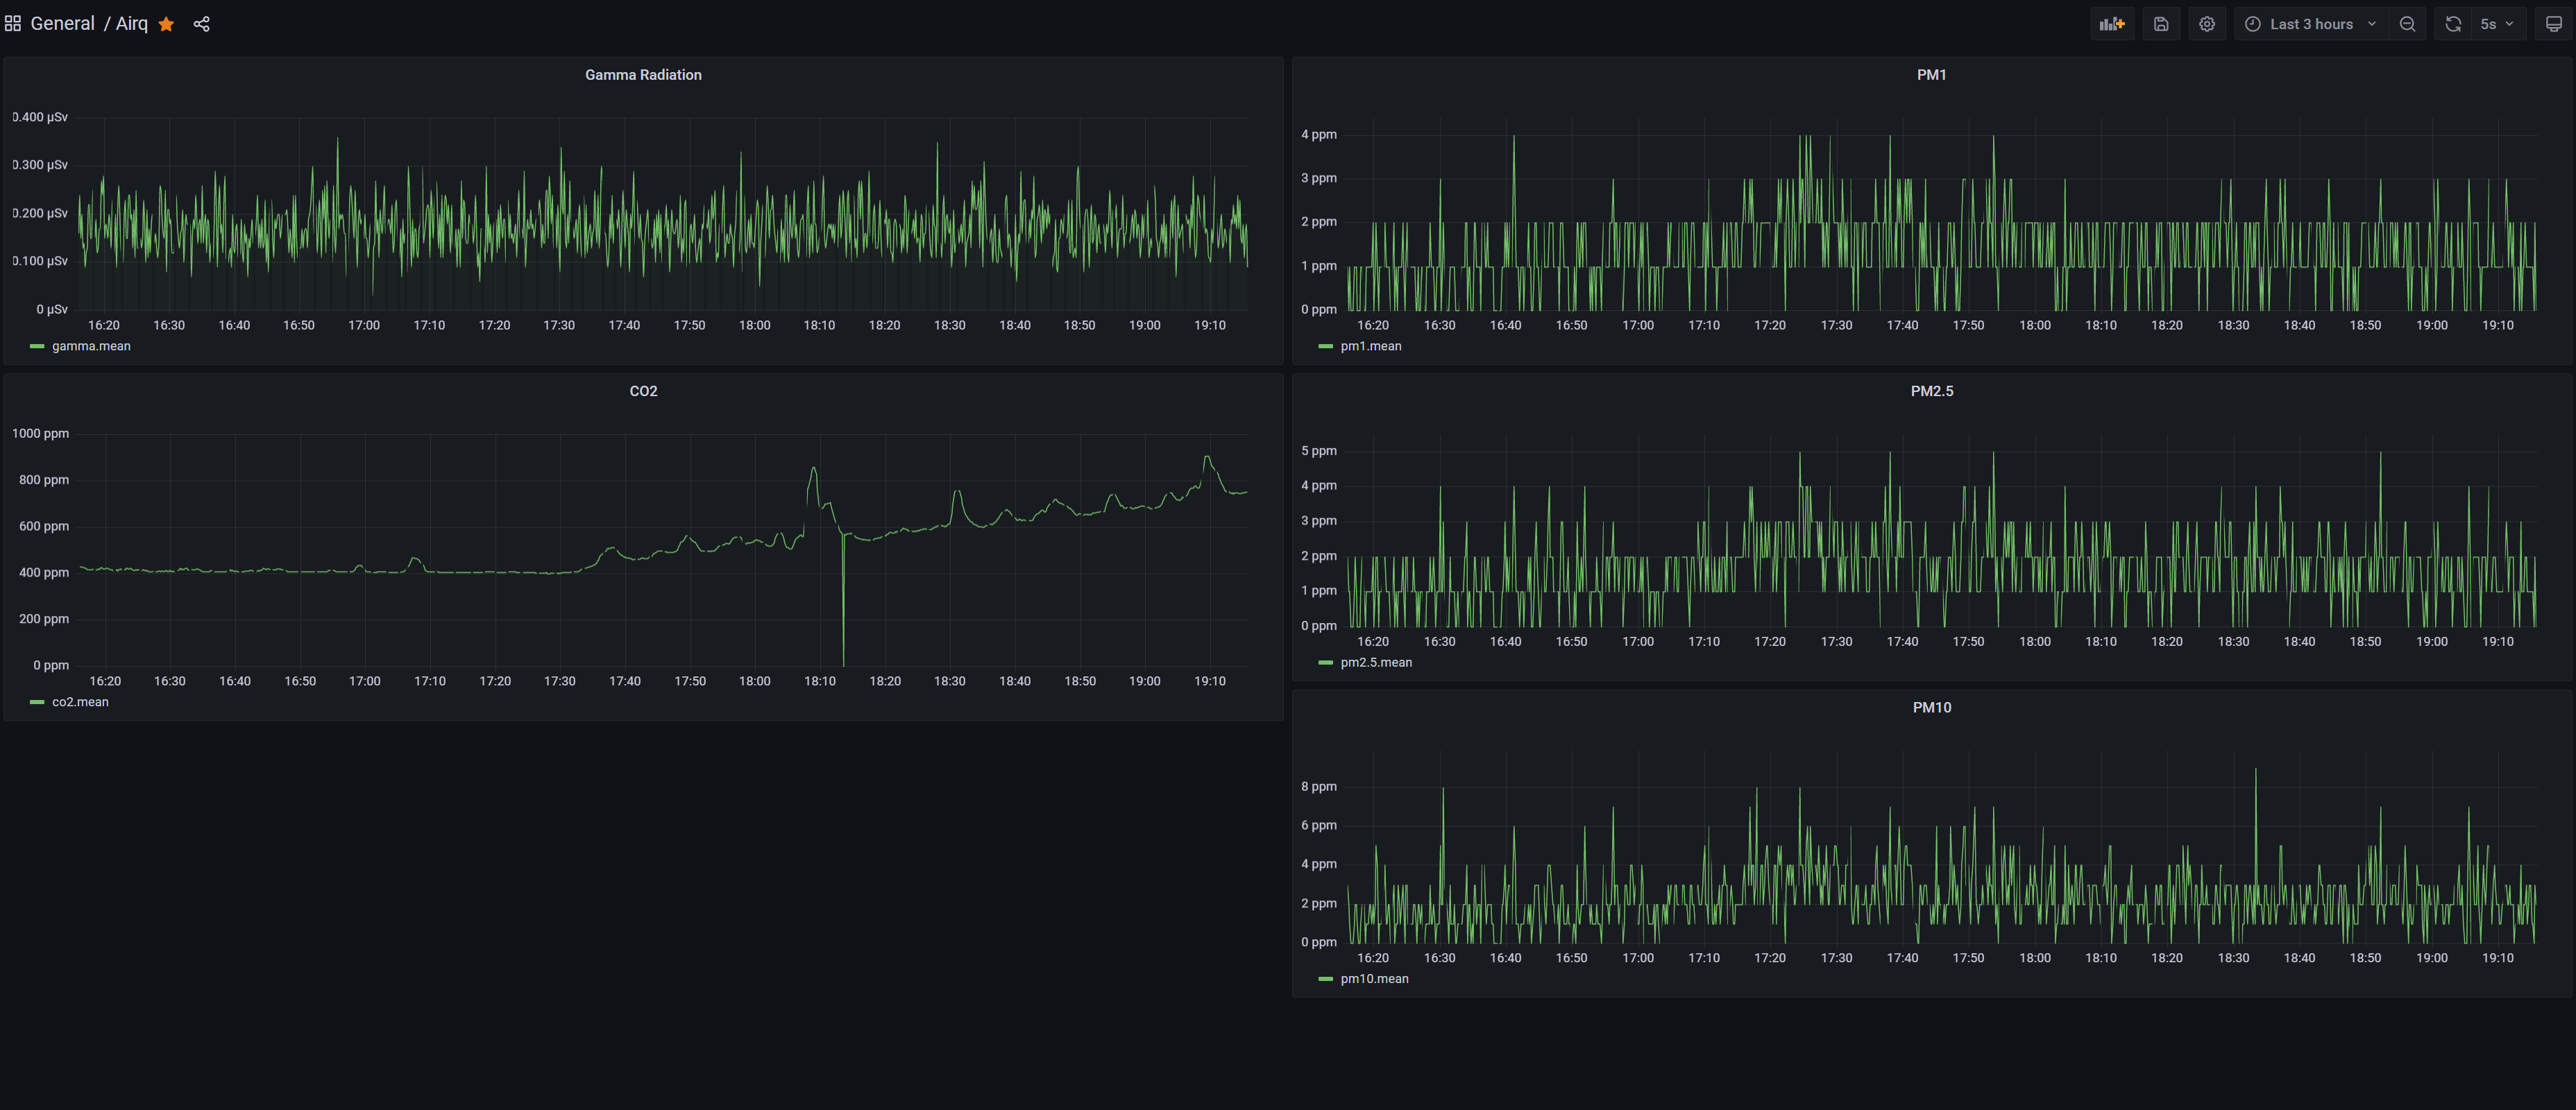
Since we are using mqtt and InfluxDB, we can easily plot the data with the popular graphing tool Grafana:
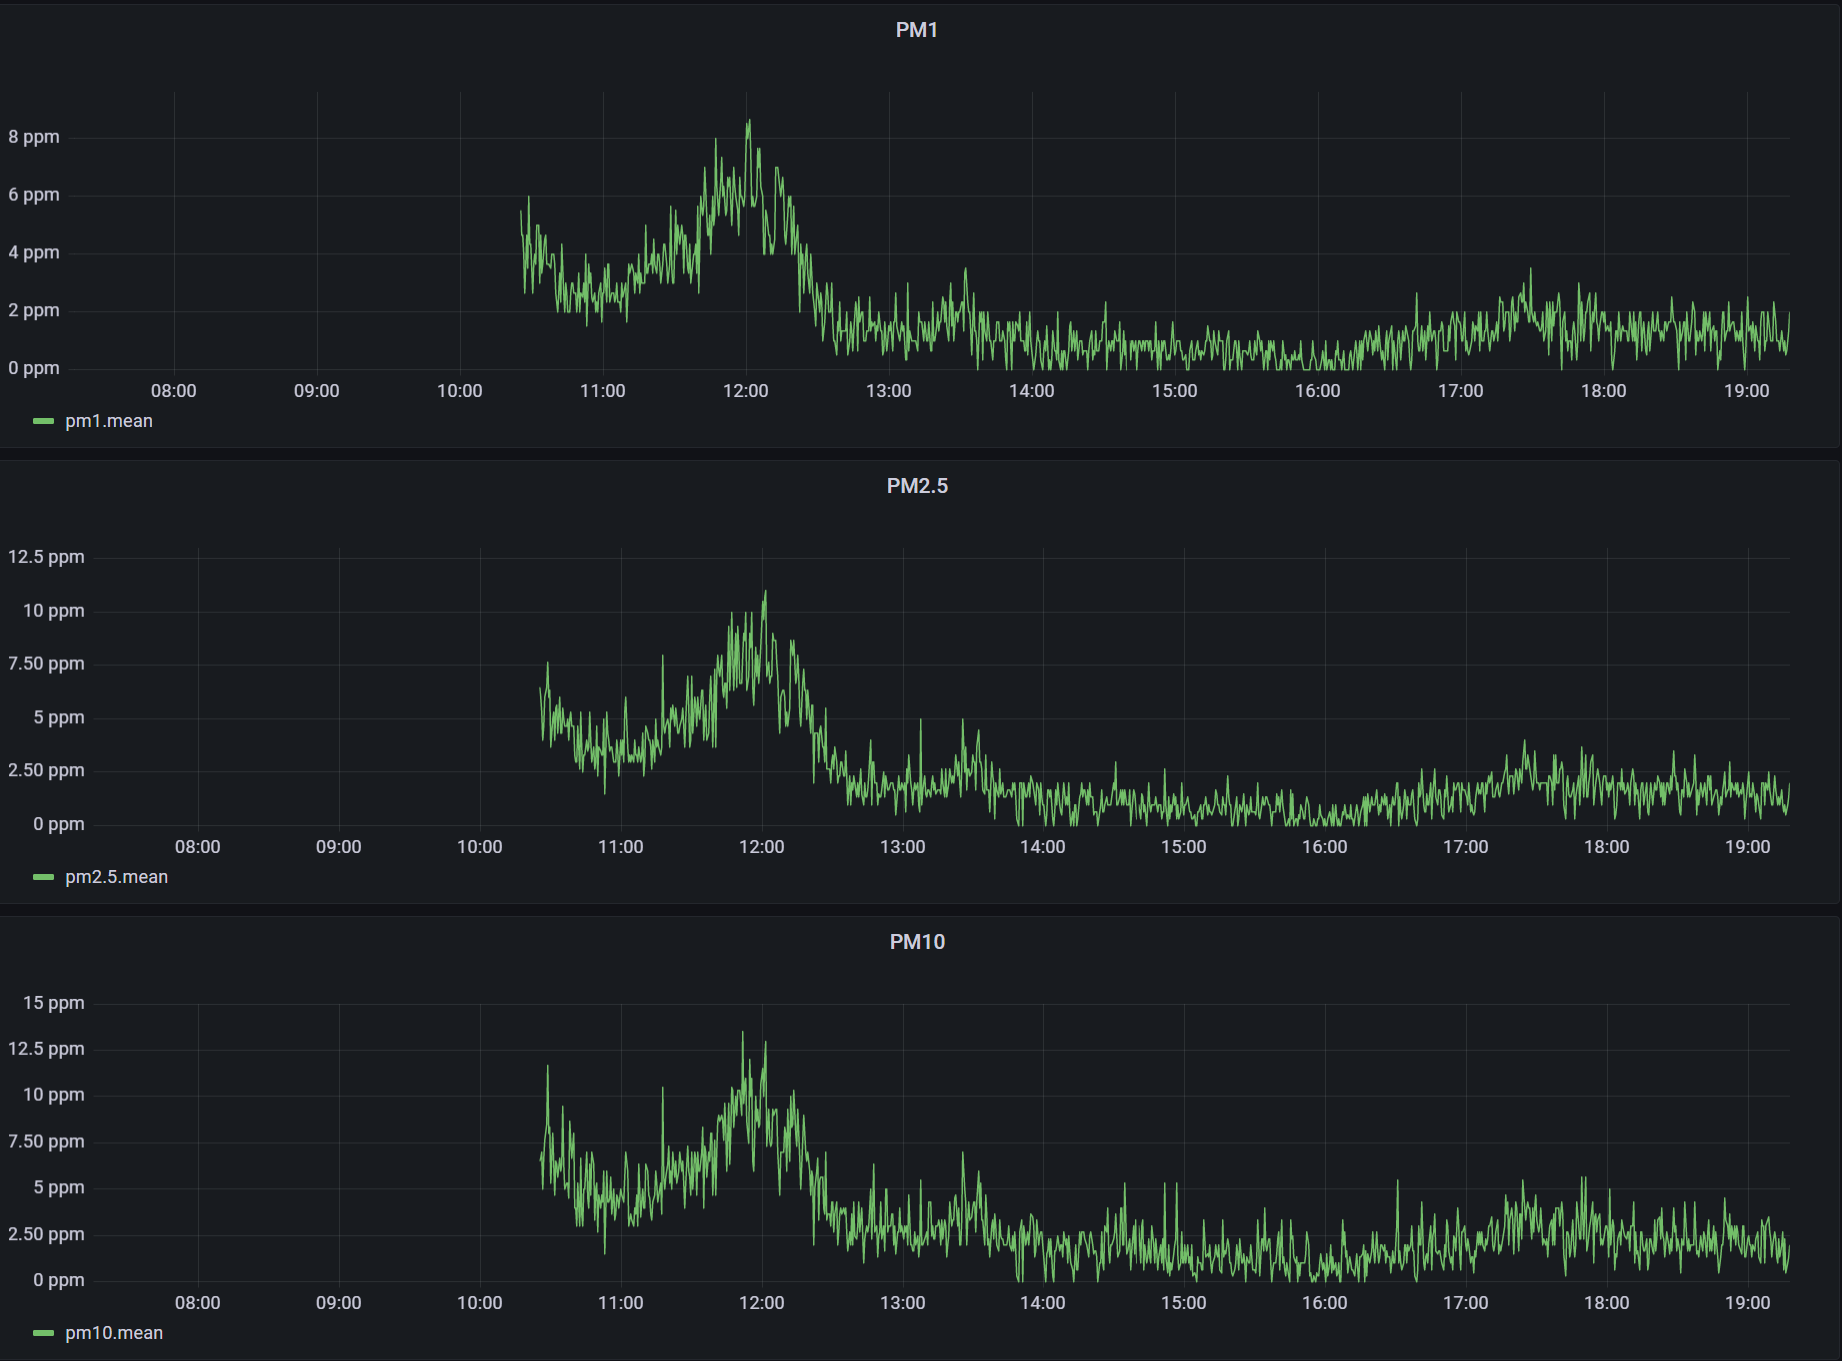
On the top left you can see the impact of mowing the lawn on the fine particles sensor about 10m from the rooms window, but still perfectly healthy levels.
On the top right you can see CO2 chart of me writing this and occasionally opening the window for 30 seconds.
Down left is the gamma-ray chart in micro Sievert, which show us the typical background radiation, no sign of radon so far, phewwww...
Conclusion:
Apart from putting my, lung-cancer-fearing heart at ease, I learned quite a lot about the components that define our air quality, be it co2 or ionizing radiation.
The pcb order was a bit rushed, causing a few mistakes to slip through, but it was only ever intended as a prototype, so if it works, it work.
On the software/hardware side I am quite astonished how much a 5$ ESP32 can do, quite a lot cheaper than an Arduino, yet so much more powerful.
I will definitely use it in future projects, like monitoring the soil moisture of my plants wirelessly or using it with a camera a long distance lorawan module to monitor local wildlife.